Add signNow buttons to the object layout manually
Easily send out your documents for signing directly from your Salesforce organization by adding the signNow button to your object. Add a signNow button to each object page layout.
Take a look at how to place the signNow button on your object page layout.
- Use Quick Find to select your object page layout (Opportunity Page Layout in the example) and click Edit.

- Select Buttons in the Object Page Layout, choose a button (Send With signNow in the example) and then drag and drop it in the Object details Custom Button section. Click Save to apply changes.
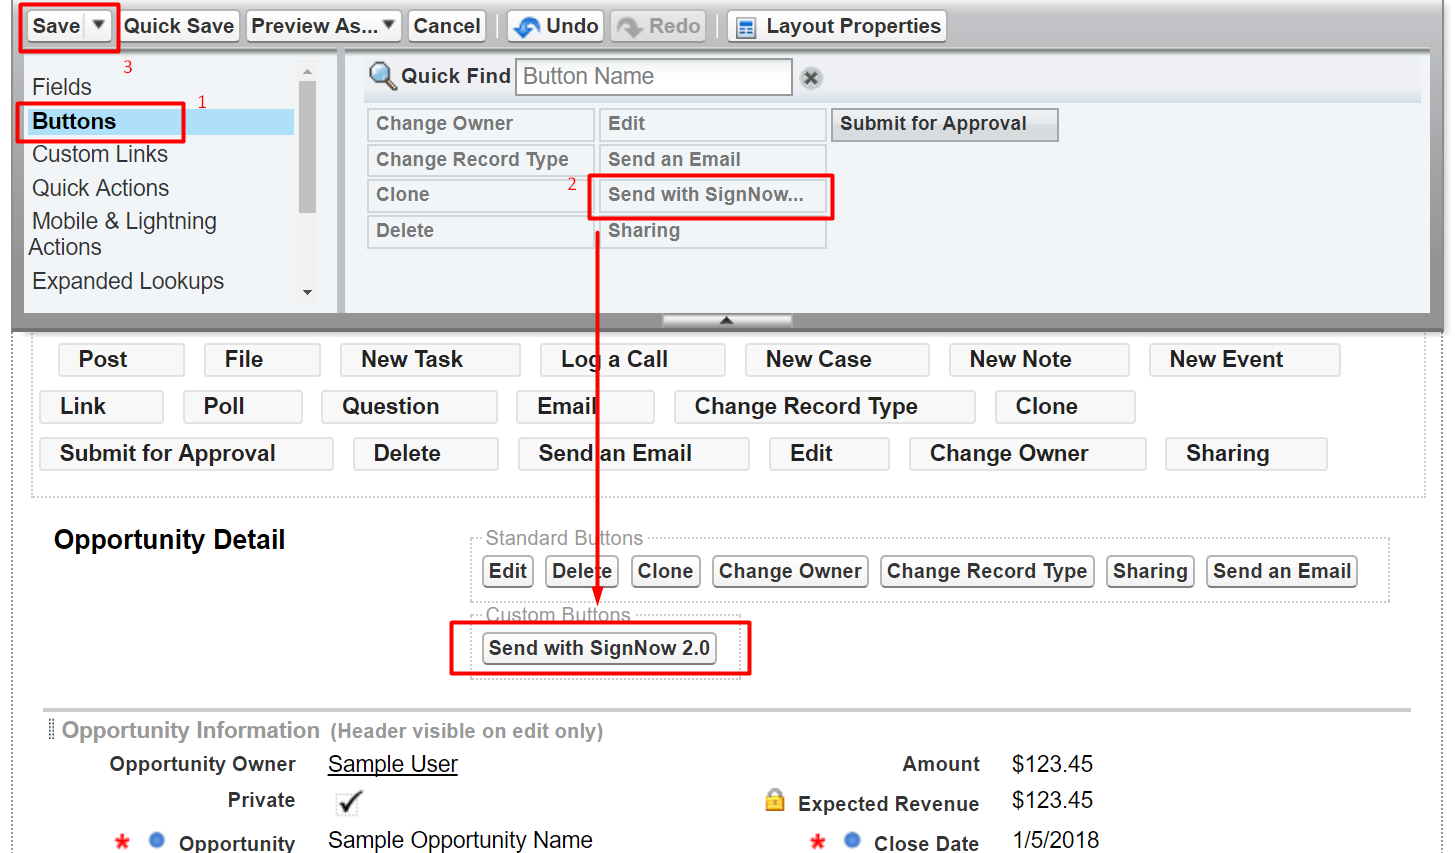
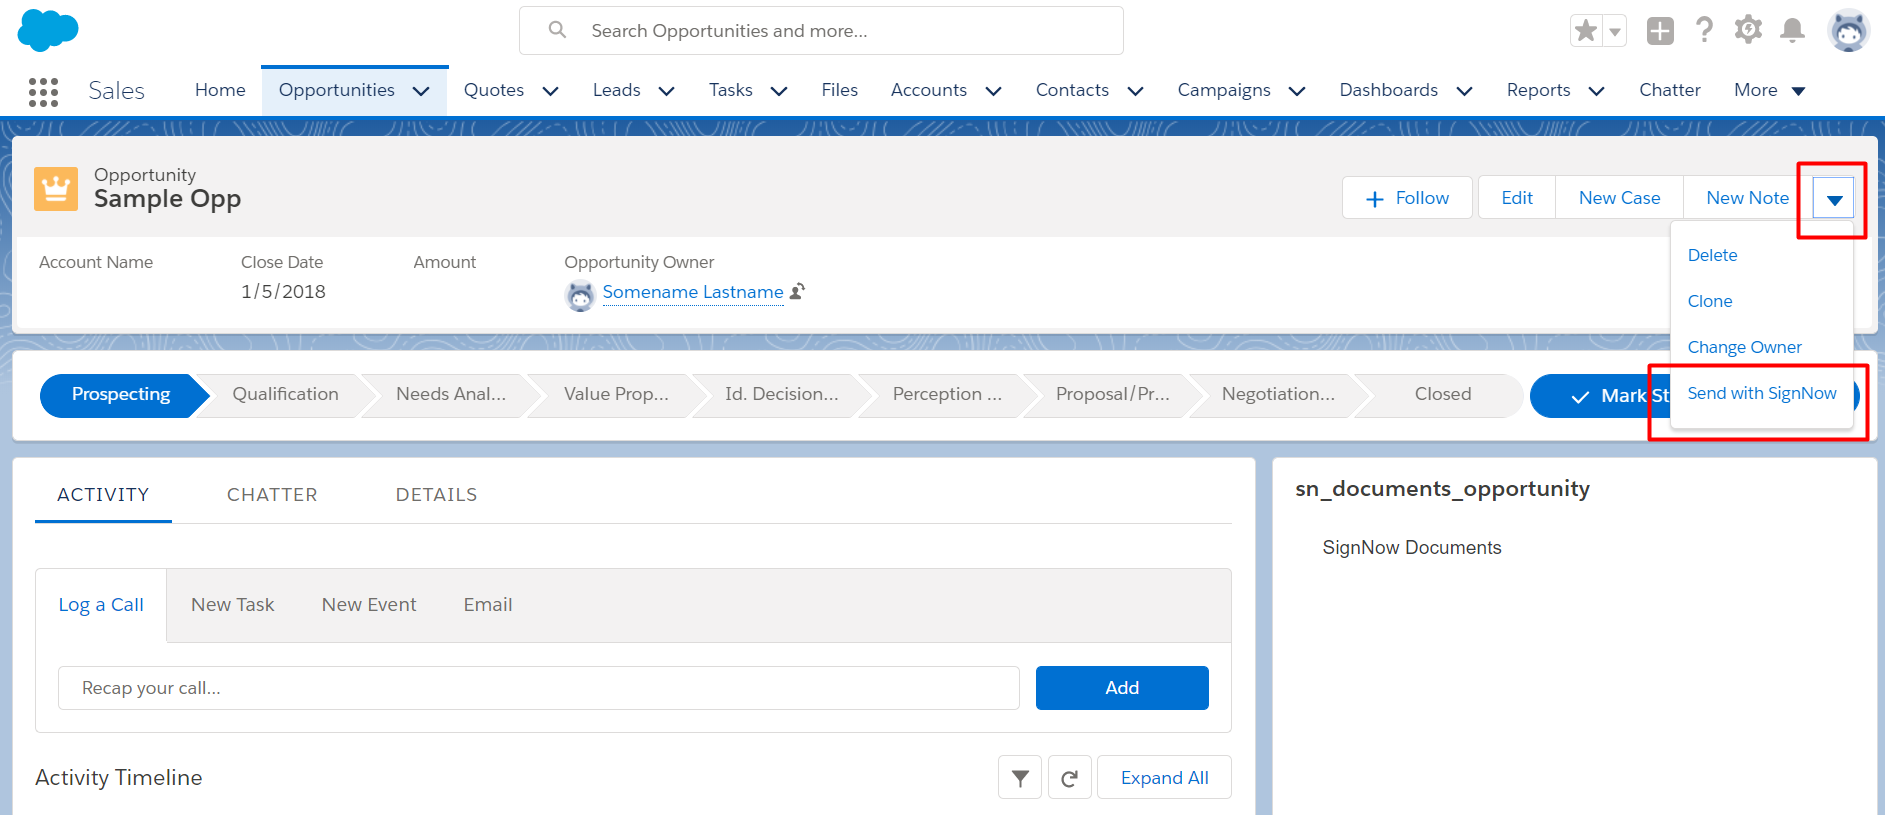
Now your signNow custom button is ready to use directly from your object record page.
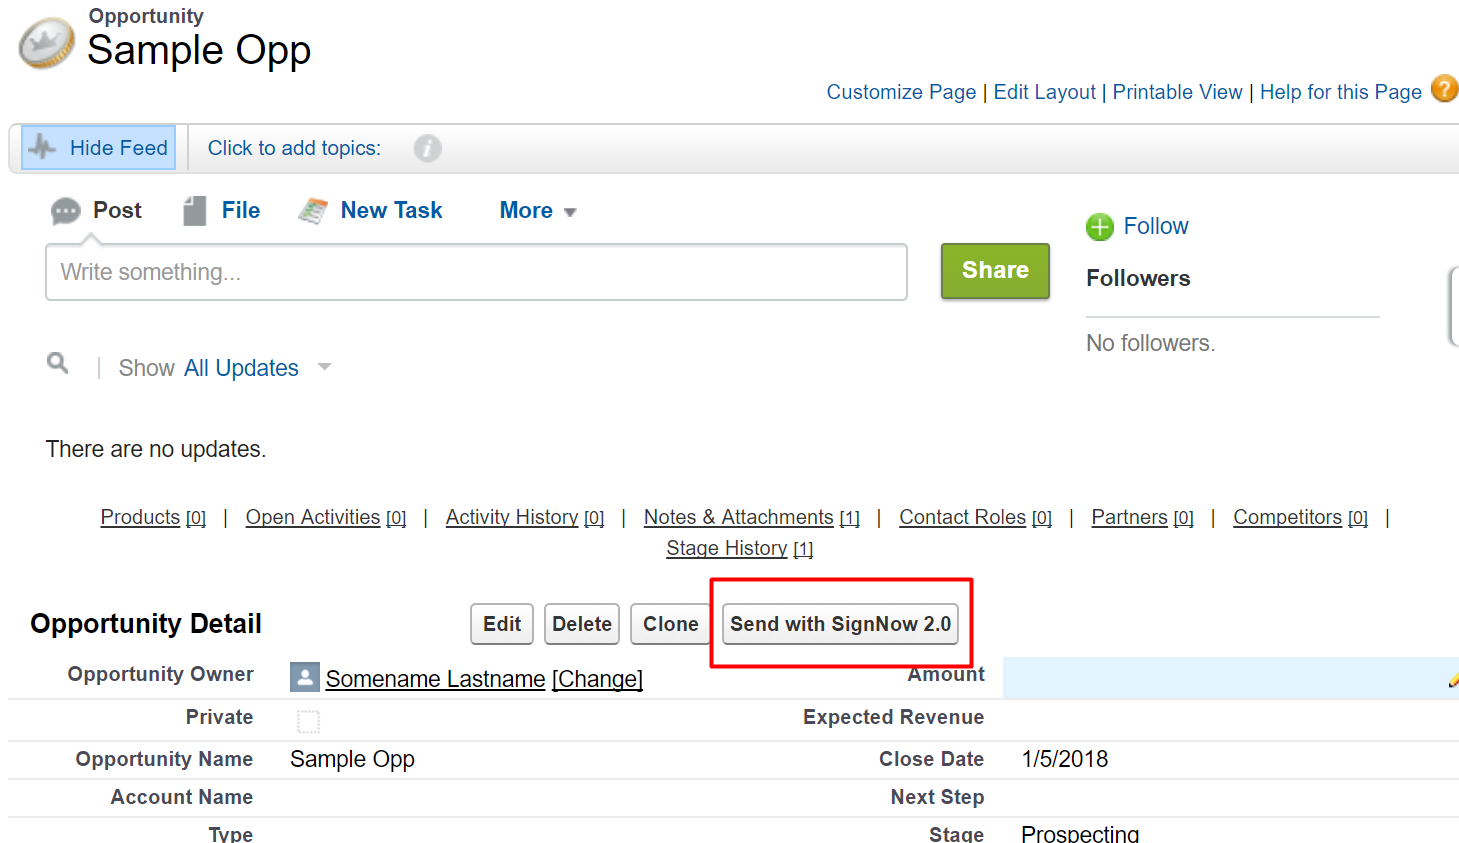
Note: If your signNow button hasn’t appeared in your object page when running Salesforce Lightning, follow the steps below to enable it.
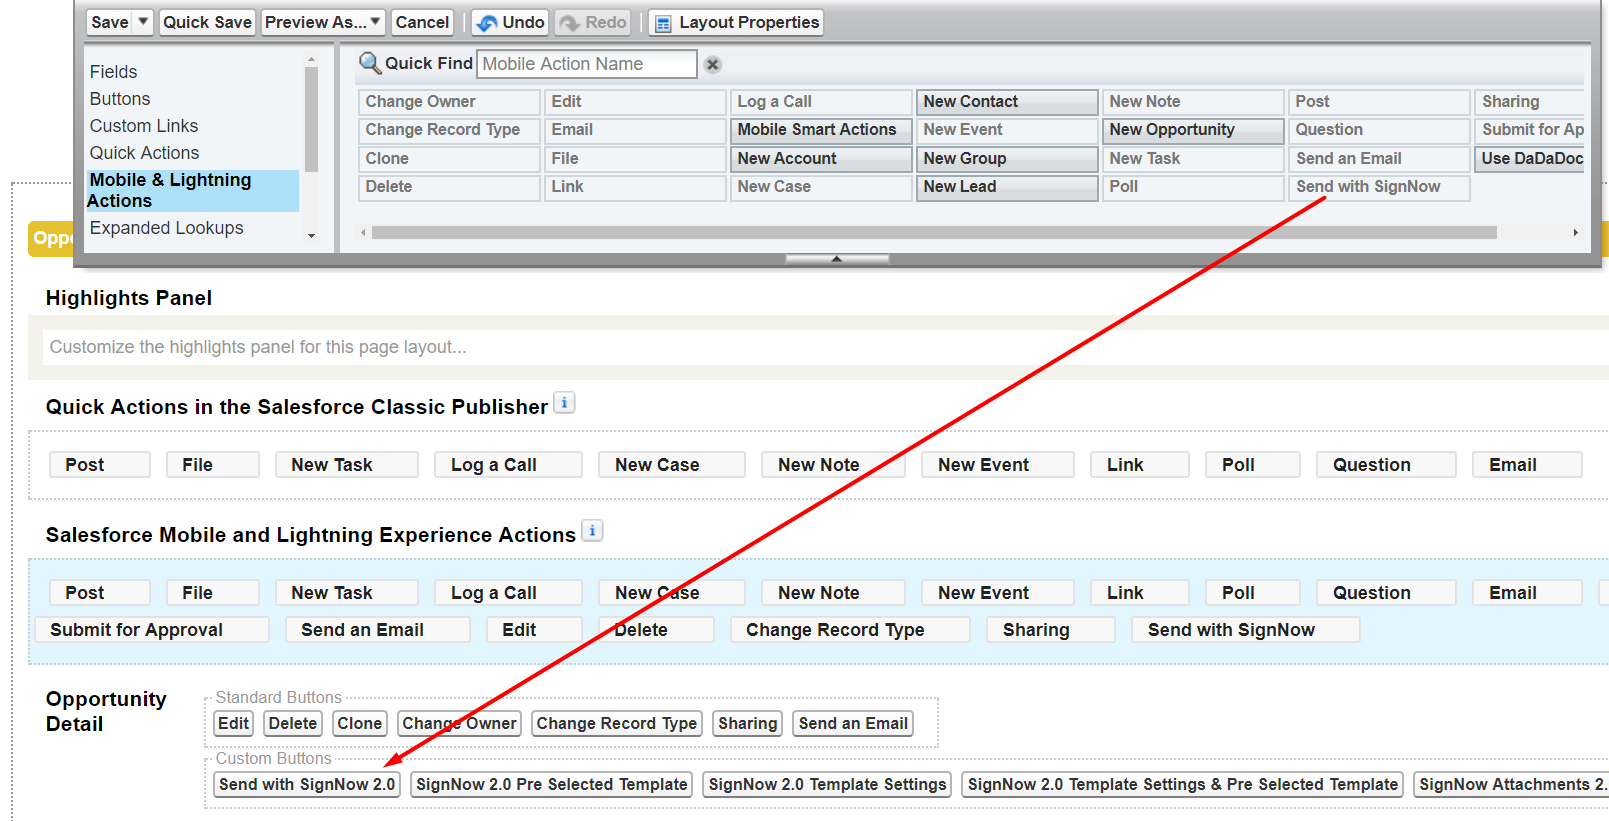
On your object page layout (Contact Layout in the example) select Mobile and Lightning Actions, find your signNow button and drag and drop it to the Salesforce Mobile and Lightning Experience Actions section. Click Save to apply the settings.
Alternatively, on your object page layout, find the Salesforce Mobile and Lightning Experience Actions section and click Revert to the Mobile Actions Default. Click Save.
Note that reverting to default may affect your custom settings in this section.
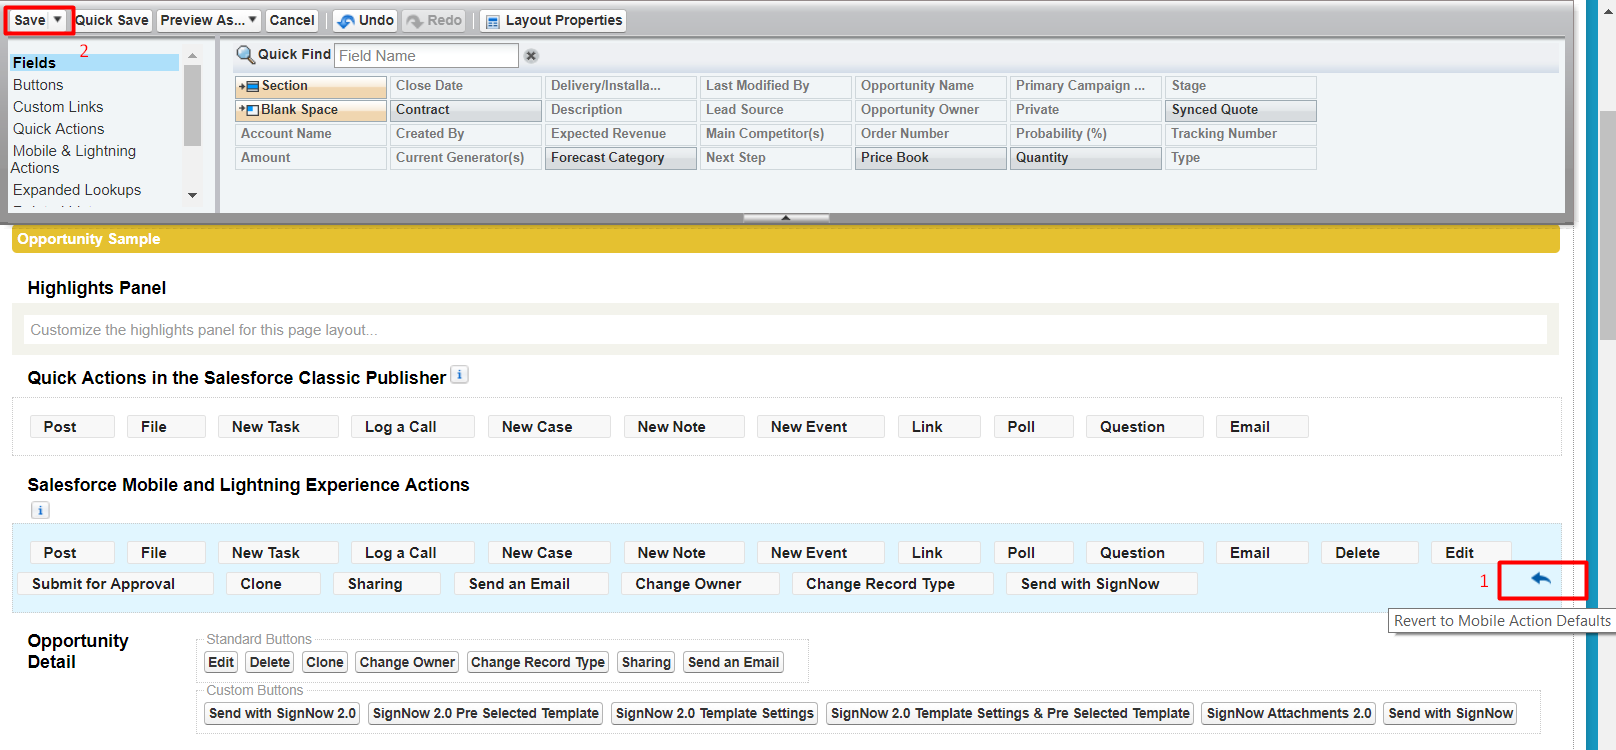
Now your signNow custom button is ready to use directly from your object record page in Salesforce Lightning.
Updated over 5 years ago
