Enable connected apps
Connect signNow to your Salesforce organization by enabling access to it.
Follow these steps to enable access to signNow connected apps:
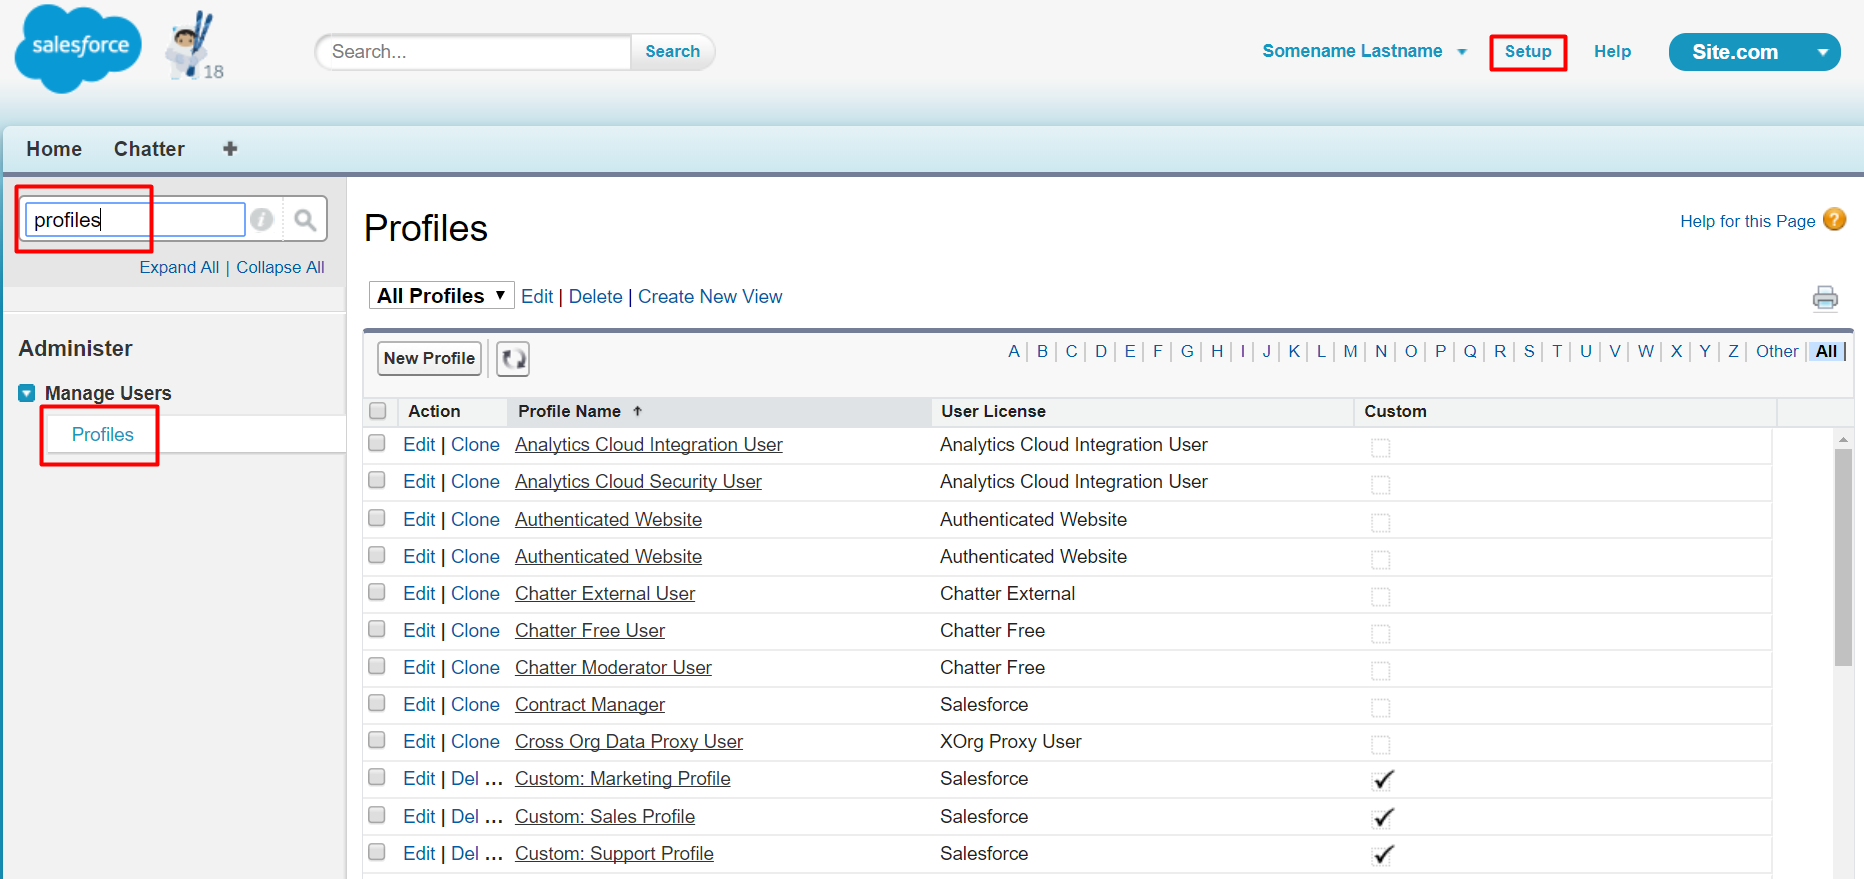
- Go to Setup and type Profiles in Quick Find. Select Profiles from the search results. Click Edit next to the required profile.
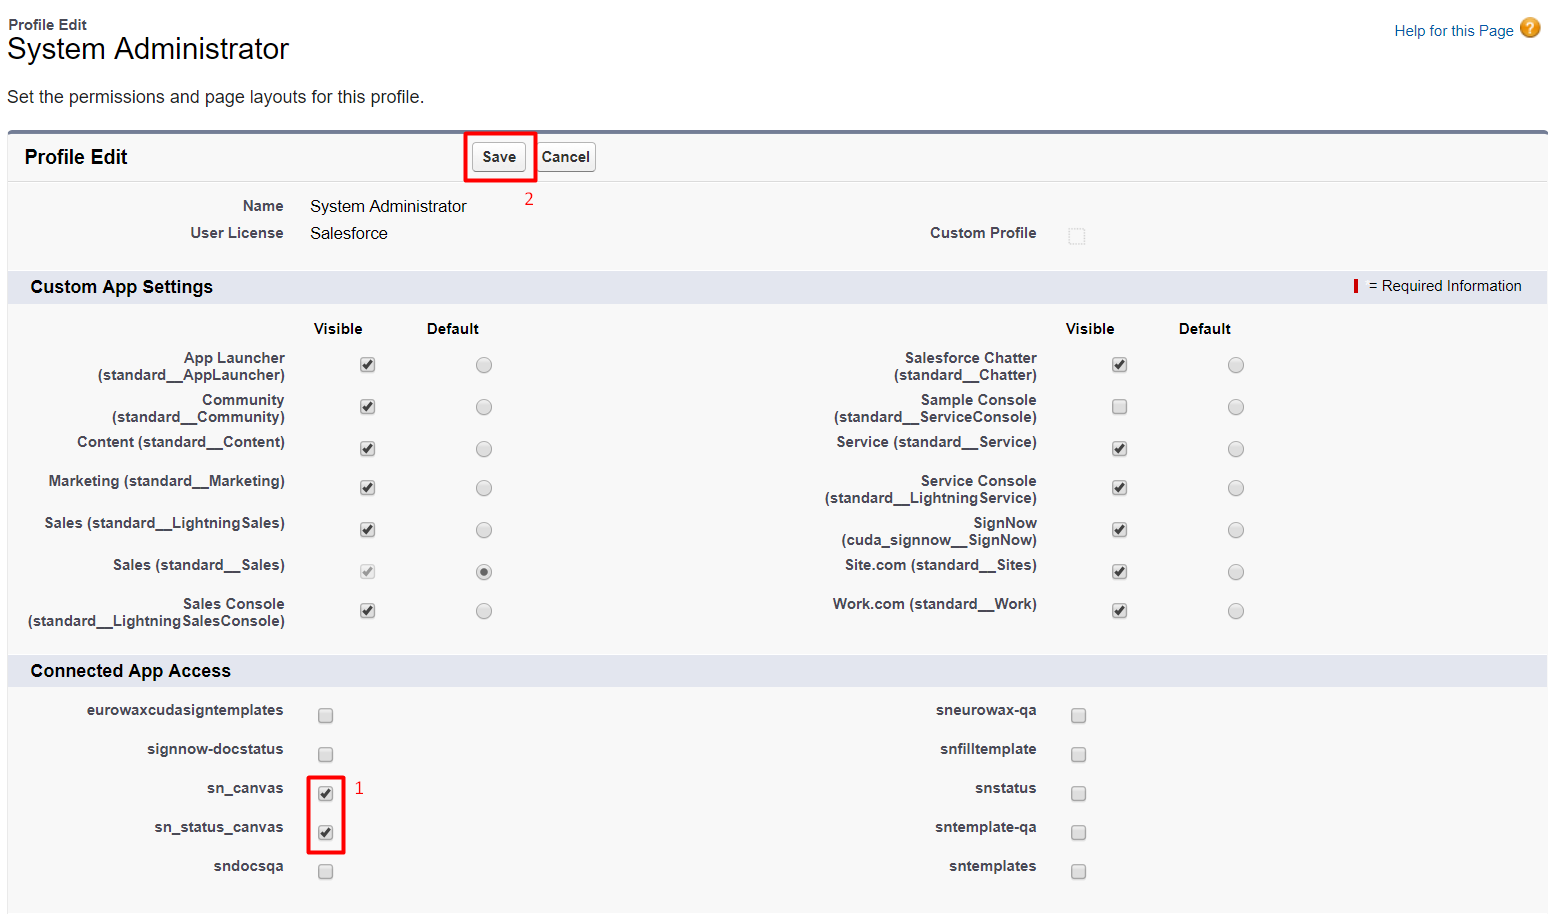
- In the Connected App Access section, check the sn_status_canvas and sn_canvas boxes and click Save.
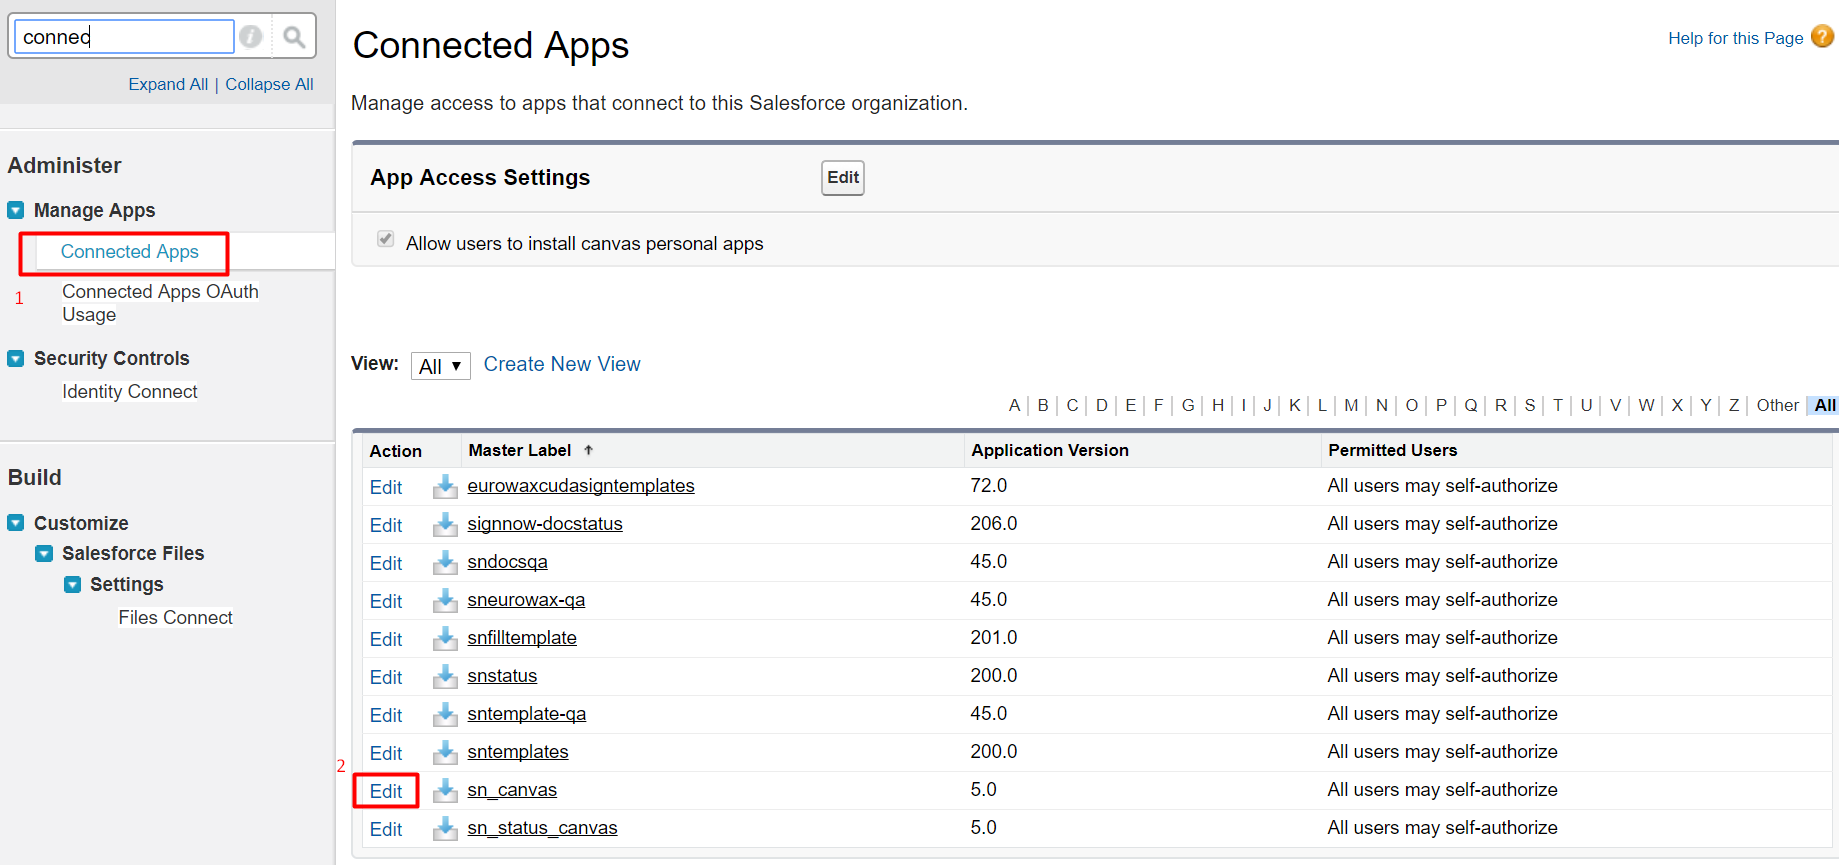
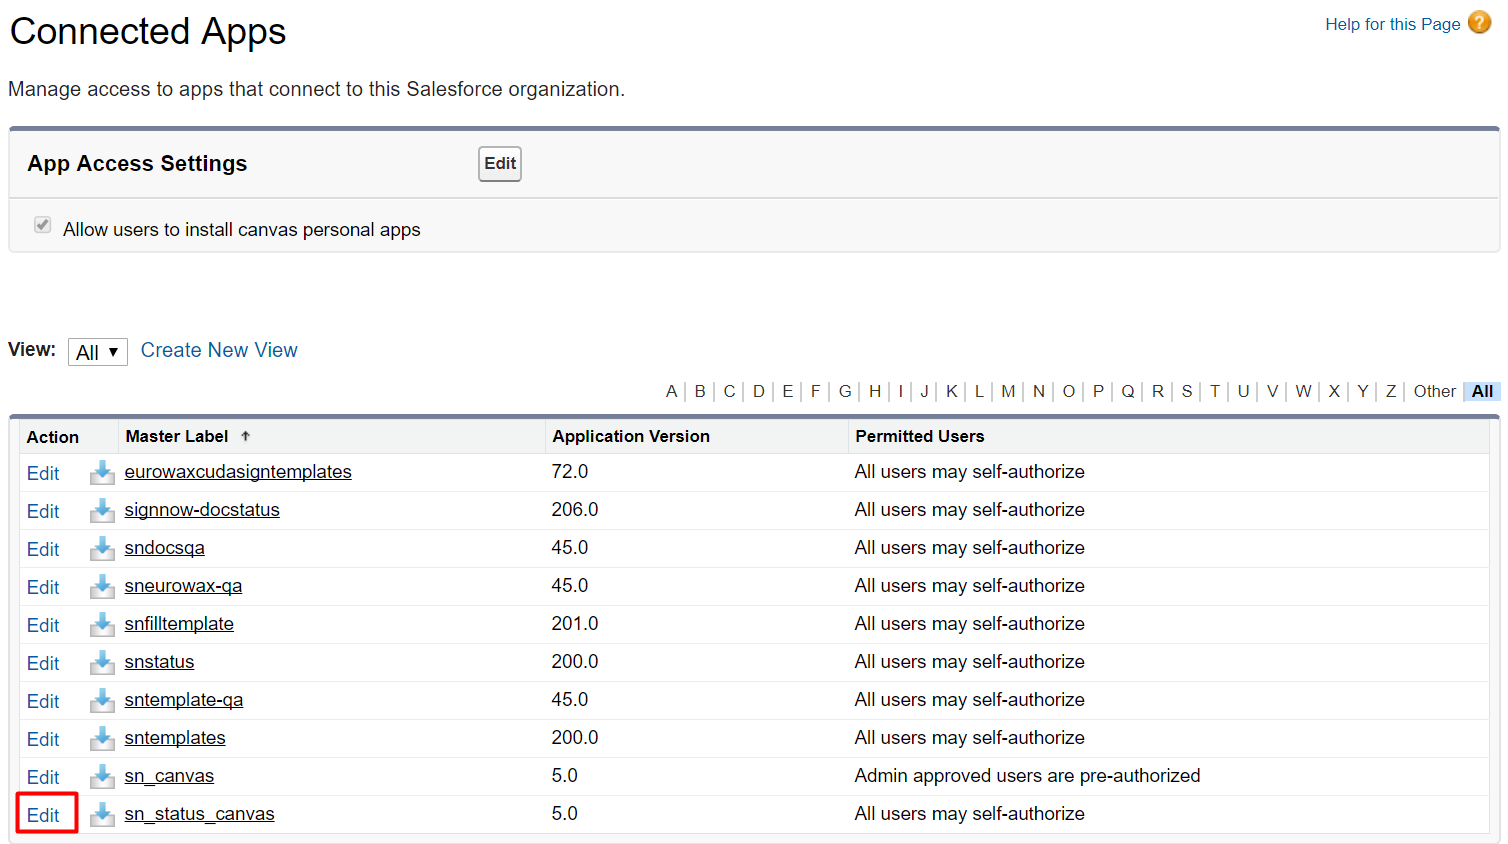
- In Quick Find, type Connected Apps and select it from the search results.
3.1. Find sn_canvas and click Edit.
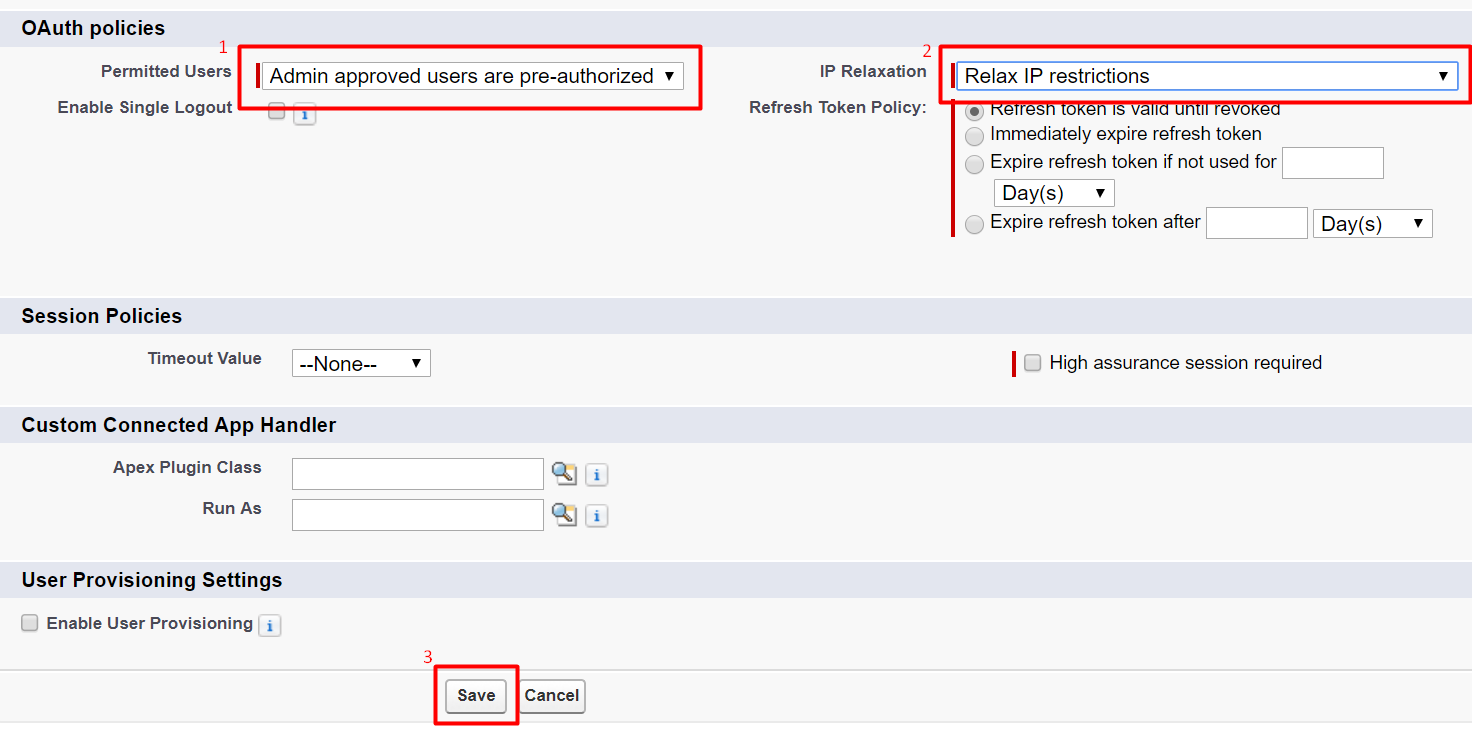
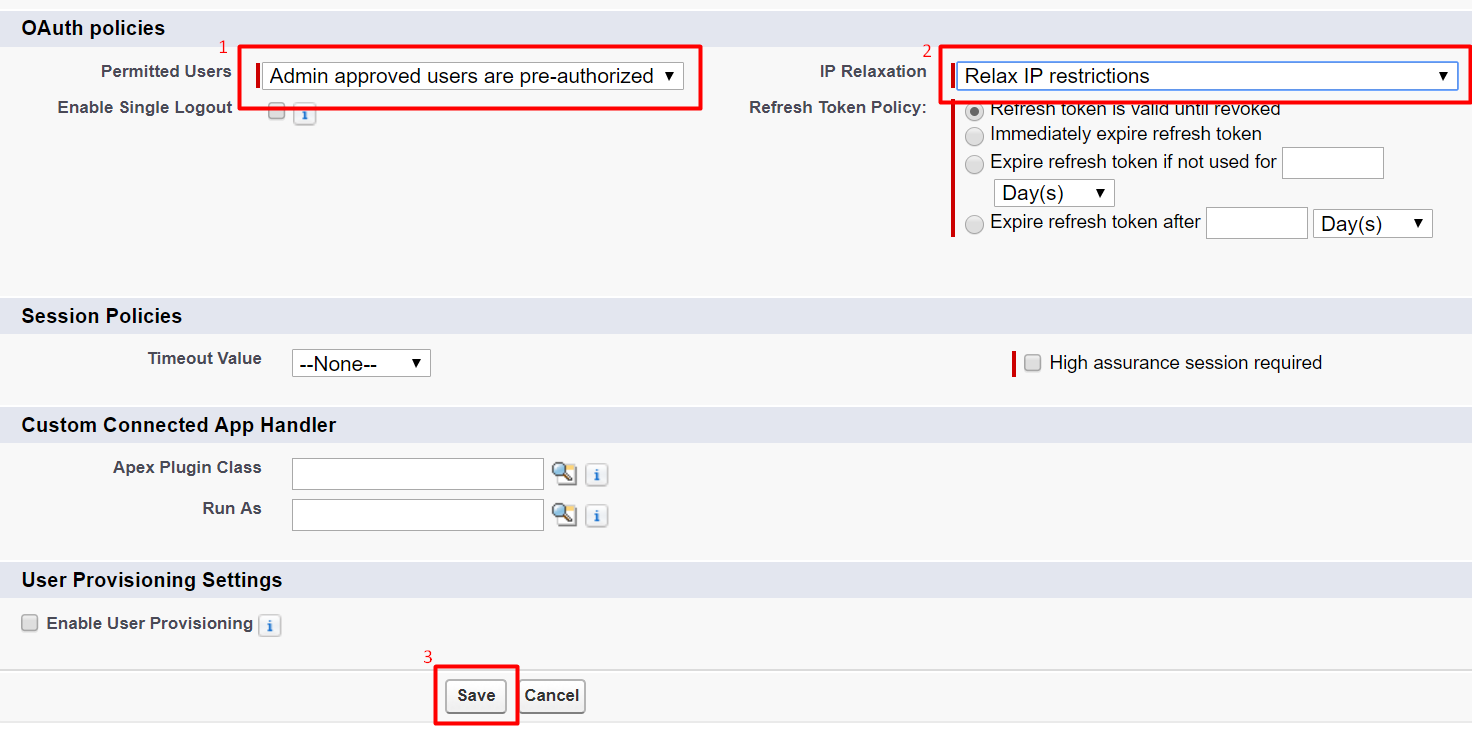
In the OAuth Policy section in the Permitted Users dropdown, select Admin approved users are pre-authorized.
In the IP Relaxation dropdown, select Relax IP restrictions.
Click Save to apply changes.
3.2. Find sn_status_canvas and click Edit.
In OAuth Policy section in Permitted Users dropdown, select Admin approved users are pre-authorized.
In IP Relaxation dropdown, select Relax IP restrictions.
Click Save to apply changes.
Now you can add signNow buttons to your objects to use the signNow application directly from your record pages.
Updated almost 6 years ago
