signNow Quotes (for the Quotes object only)
Note: before adding the signNow Quotes button, the Quotes object must be enabled for your Organization. Use Quick Find to locate the Quotes Settings and check the Enable Quotes box.

Select the page layouts that should include the Quotes related list by checking the respective boxes (Opportunity Layout in the example) and click Save.
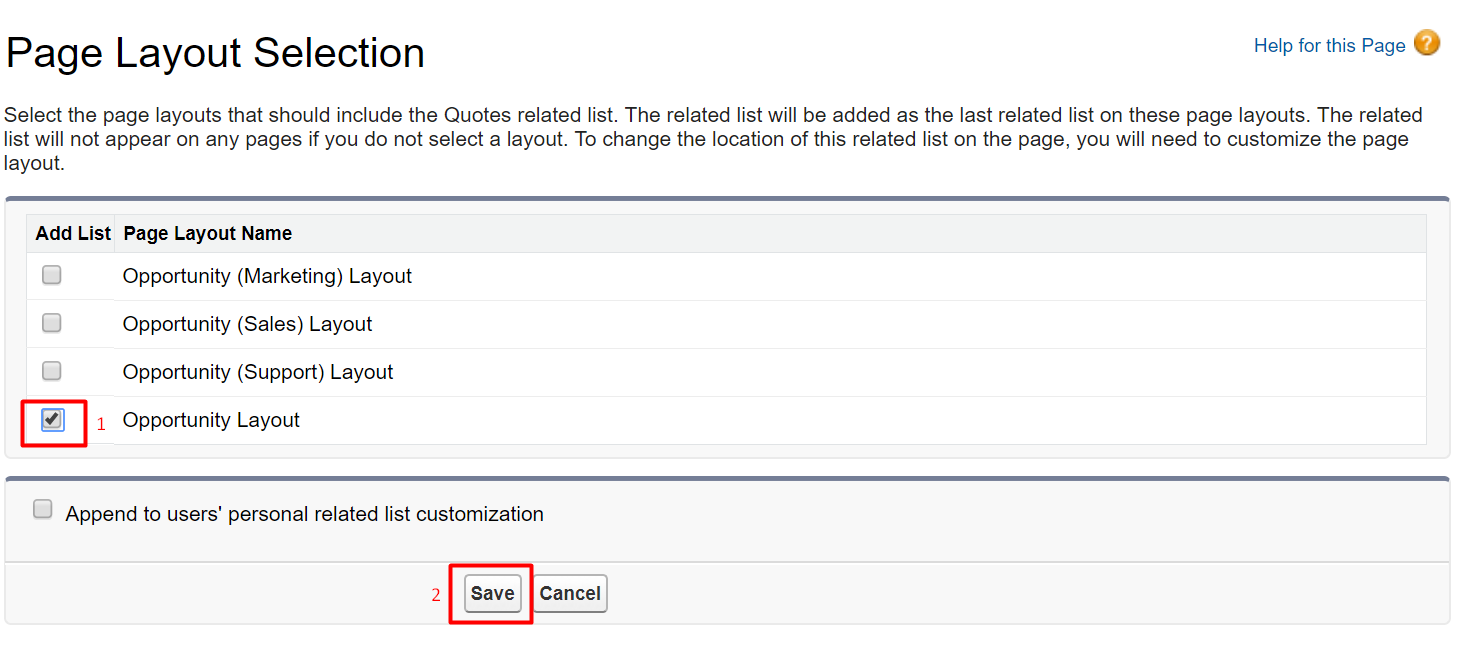
Proceed to step 4 in this guide to create a signNow Quotes button for the Quotes object.
Usage:
Send Quotes with the signNow Quotes button.
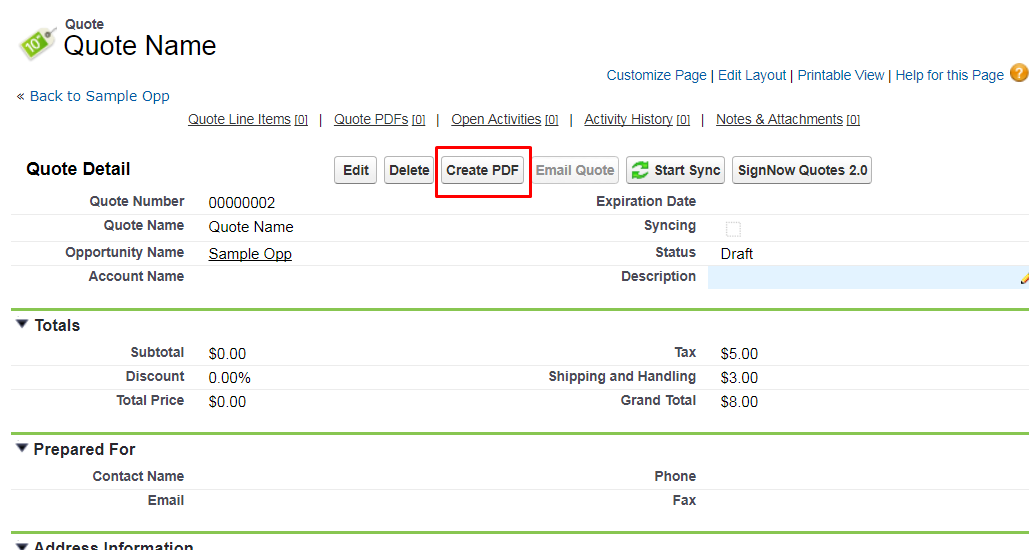
- In your object (Opportunity in the example) click Quotes. Select a Quote or create a new one and on the Quote page click Create PDF.
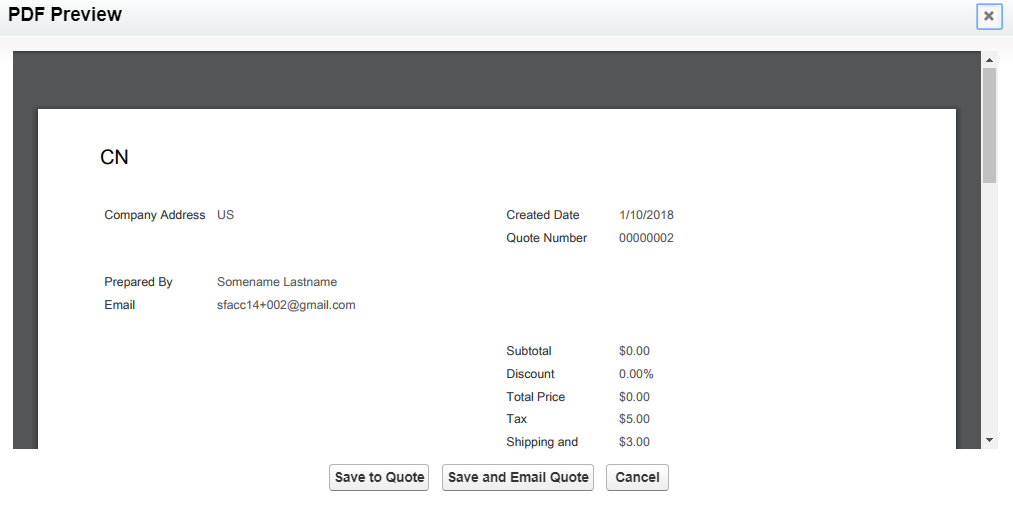
- A new PDF document with your Quote details will be generated. Click Save to Quote.
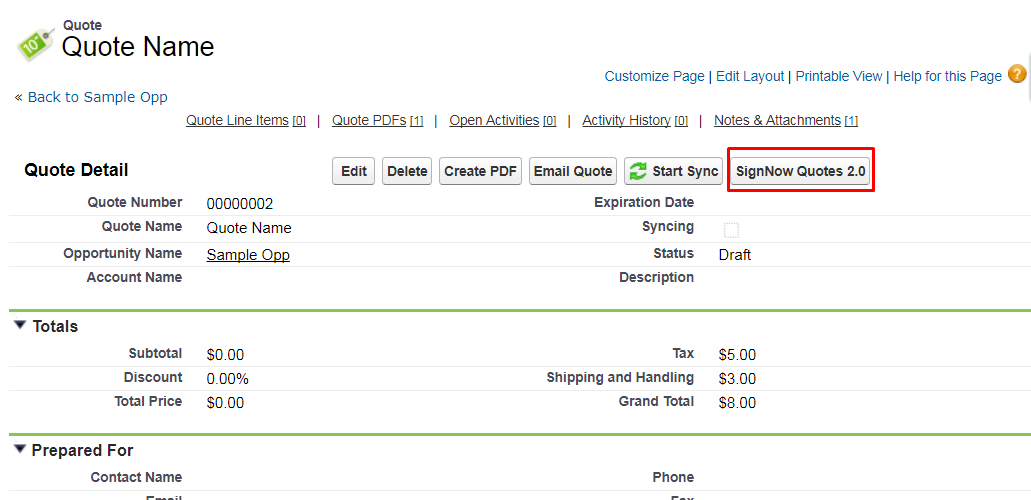
- On your Quote page, click signNow Quote.
- Select your PDF document from the quote record list. Use the Search bar to find the required quotes if the list doesn’t fit on the page.

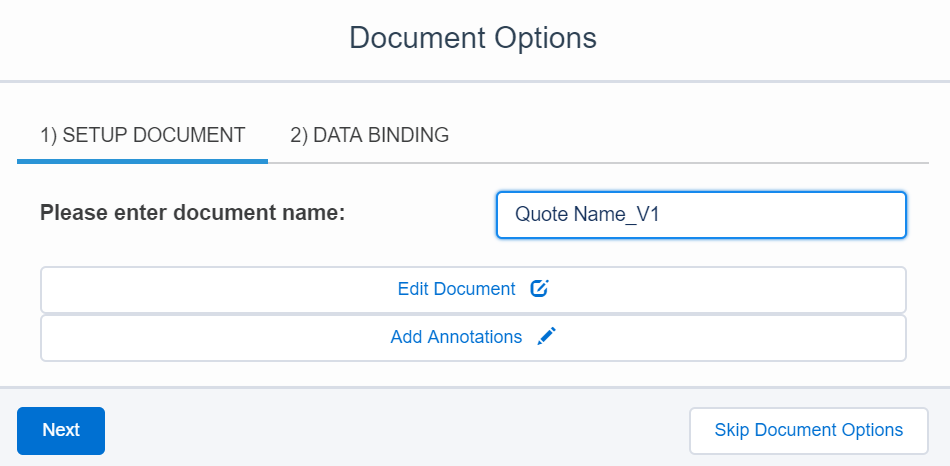
- Enter a name for your document.
Click Edit Document to open the document in signNow and begin editing it (add fillable fields, checkboxes, dropdowns, etc.).
Alternatively, you can import fields from specific signNow templates into your documents. (Refer to the Template Settings section of this guide).
Click Add Annotations to add Salesforce annotation fields to the document.
Once finished, click Next to proceed to the Data Binding settings or Skip Document Options if all necessary settings have been specified.
- In the Salesforce Data Binding section, you can prefill documents with data from Salesforce records or update the fields of a Salesforce record with the collected information of a filled document.
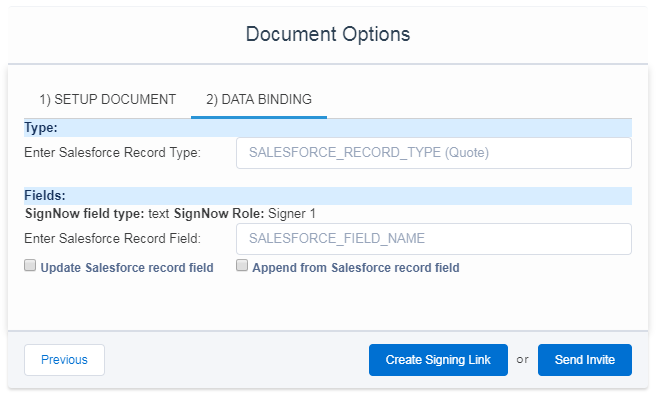
If you need to change your settings, select Previous to go back to Setup Document.
Once all settings have been specified, you can send signature requests to recipients.
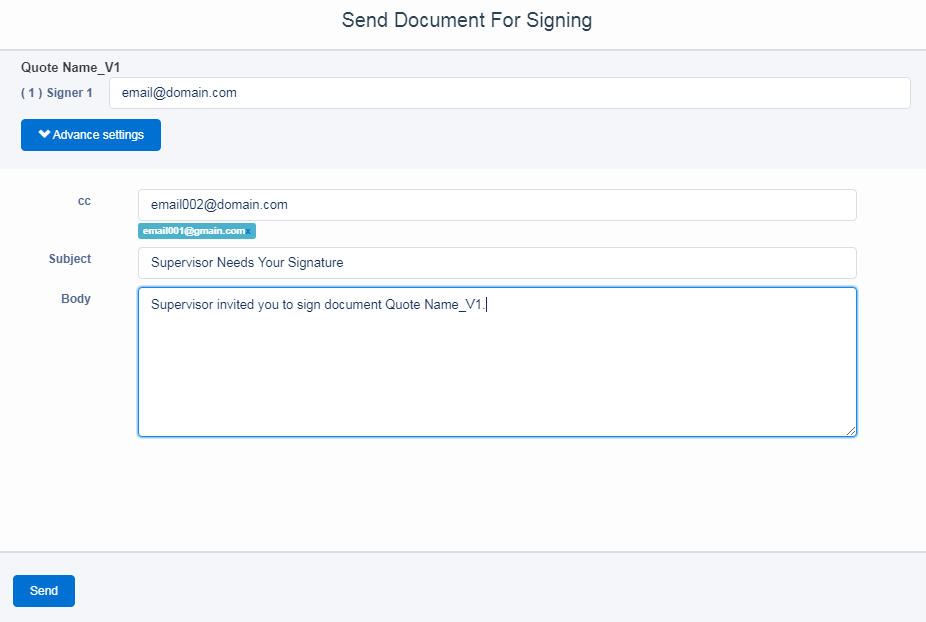
- Select Send Invite to send your document for e-signing to recipients via an email.
In the next window, enter recipient details. Use Advanced Settings to protect your document with a password, set an expiration date and add a reminder. To send the document, click Send.
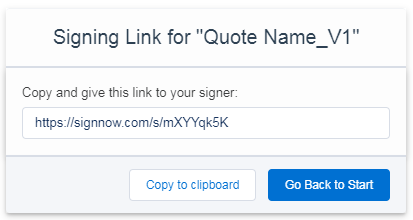
Click Create Signing Link to generate a document link that can be directly shared with recipients.
In the next window, click Copy to clipboard to copy a document’s link and provide it to your signers.
Updated almost 6 years ago
