Document status
Easily track the status of your documents you have sent out to be e-signed as well as instantly get all details about documents sent such.
Document Status and Invite Options
Document Status
View, update or cancel your signature requests as well as download signed documents directly in the signNow Document Status tab. All the sent requests are shown in the tab with the following details: name of the document (or group of documents), recipient email(s), status (pending or fulfilled), date sent, date signed and date of expiration.
Follow these steps to add it to your record page.
Salesforce Lightning
- On your Salesforce object page, go to Setup, then select Edit page.

- In the Lightning Components section, drag and drop Visualforce page wherever you need it to be added to the Salesforce record page.
Once added, in the Visualforce settings section, select sn_status for Visualforce Page Name.
Specify the needed height for your Visualforce page (500 in the example).
When finished, click Save.
Select Back to return to your Salesforce record page.
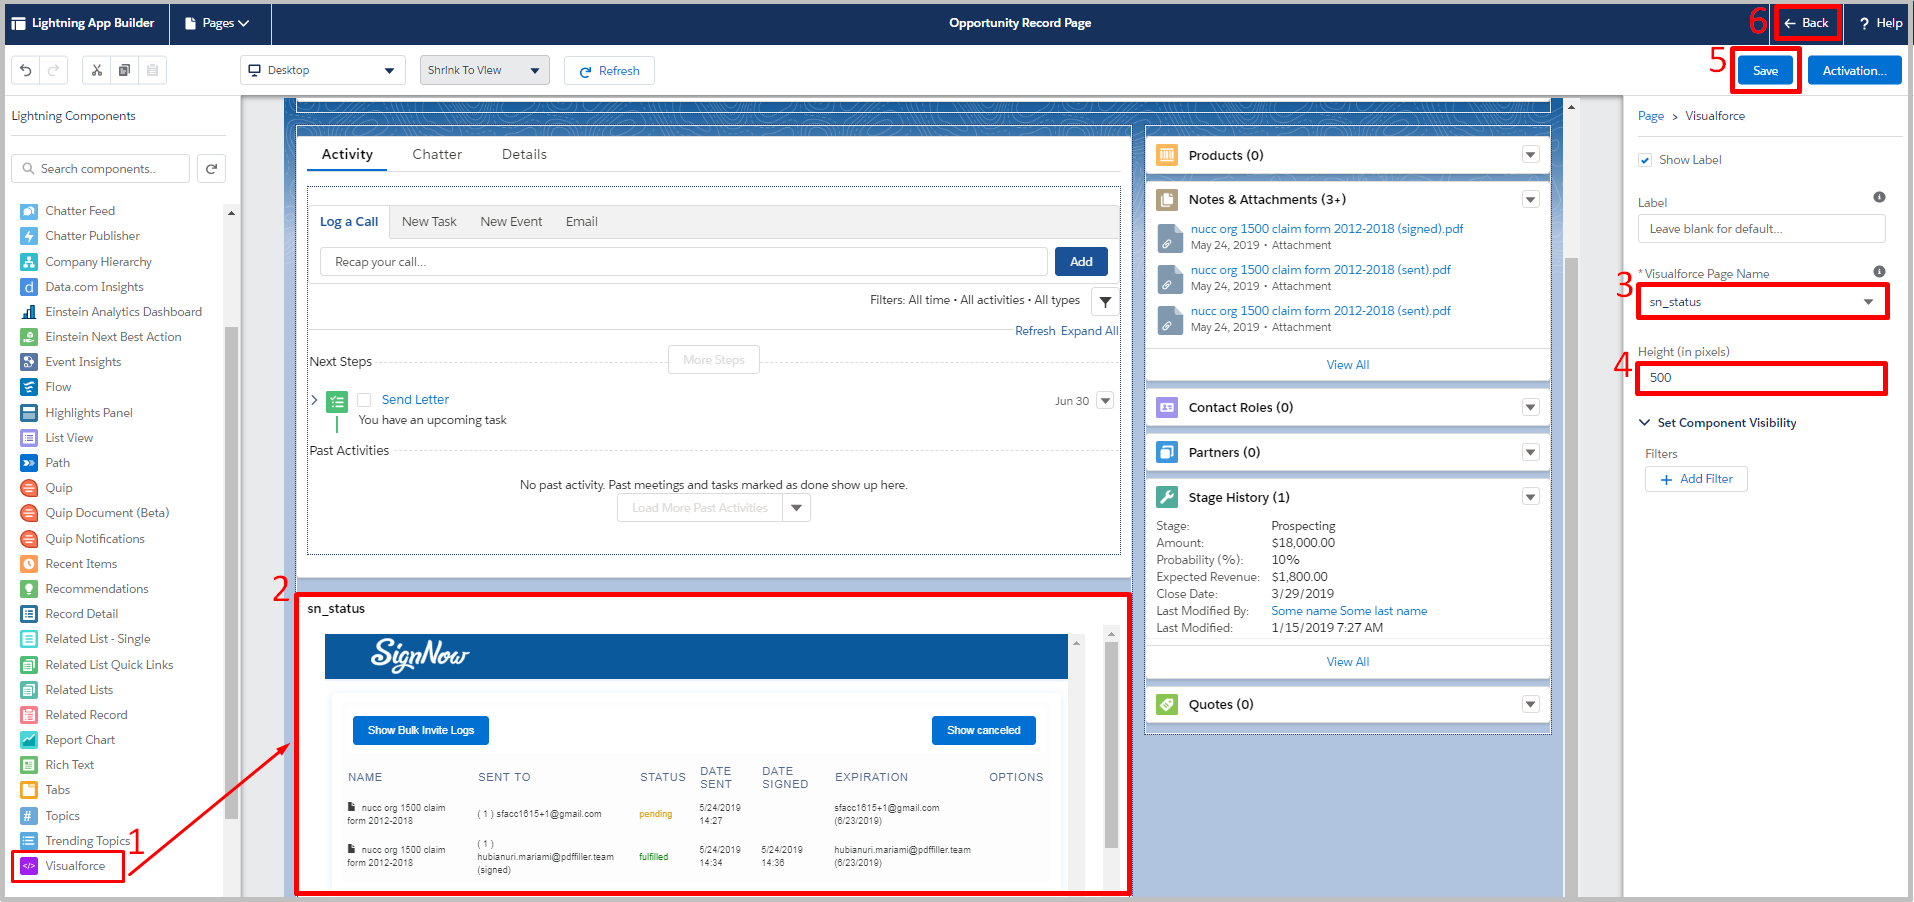
The Document Status tab will be right where you’ve added it.
Salesforce Classic
On your object page click Edit Layout (alternatively, use Quick Find to select the object page and then click Edit).
Select Canvas Apps, find sn_status_canvas, drag and drop it in the object information area.
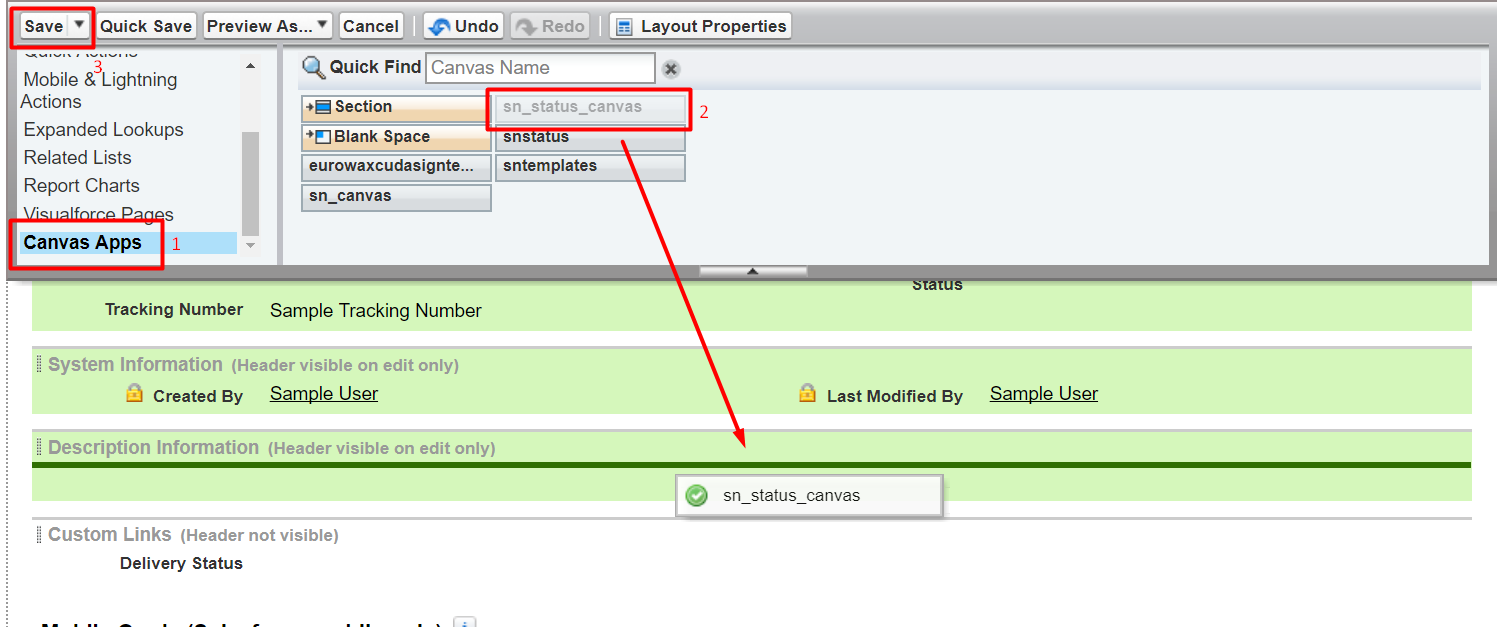
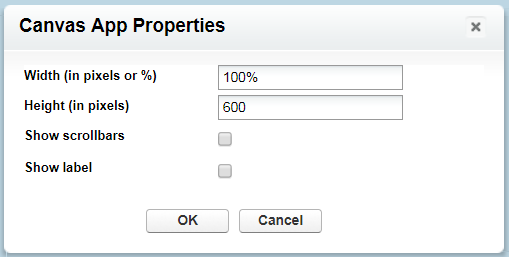
Click the wrench icon to set your sn_status_canvas properties.

You can set the width and height as well as enabling or disabling scrollbars and the label. It is recommended to set a height of at least 600 pixels as anything smaller may limit some canvas functionality. Click OK to apply changes.
That’s it! Now the Sign Status canvas has been added to your object page.
Invite options
Easily control and manage your signature requests. Update, cancel or make additional settings for your signing invites as well as download signed documents to your computer in a few clicks by following the instructions below.

- Update a Signature Request
If you don’t hear back from your customers or your documents haven’t been signed, you can update or cancel your signature request.
To do this, proceed to the document with a pending status and select the Options tab.
In the Select an Option dropdown, choose your desired action.

Select Replace Signer to replace a recipient. Specify a new email address and click Submit.

Select Advanced settings to set or change a document password, modify the expiration date or set a reminder for your recipients.

Note: Learn more about how to add a password to a document in signNow.
Select Cancel Invite to cancel an invite and remove it from the list.

Select Show Canceled to display all the invites including the canceled ones.

- Download Signed Documents
Once a document has been signed by a recipient, you can download it to your computer in a few clicks directly from the Status Canvas. To do so, proceed to the Options tab and click the arrow near Select an Option. In the dropdown menu, select Download Signed Document to save the document to your device.
Alternatively, select Download Signed Document with Audit History to save the document along with all detailed information for changes made.
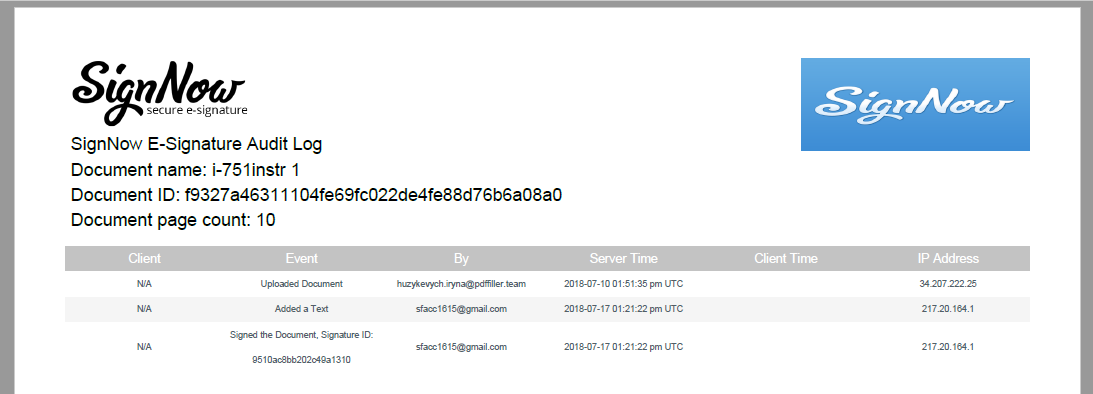
Document Status (added via a related list)
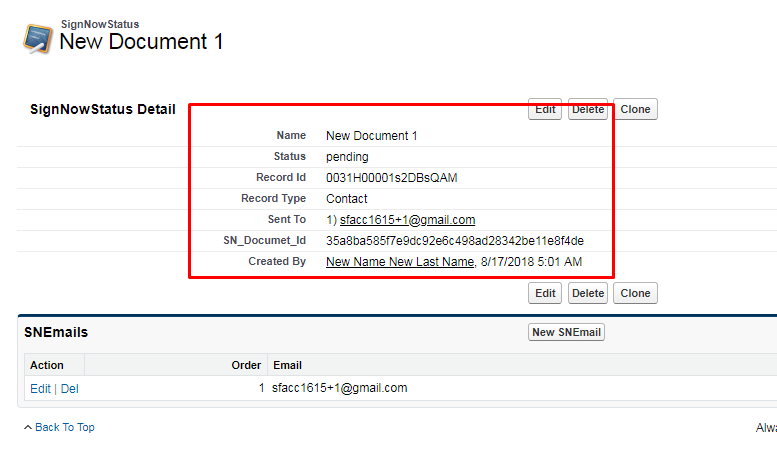
Instantly view the status of your documents sent out for e-signing as well as full info for documents such as name, ID, creator, record it is related to etc., with signNow Document Status.
Currently, signNowStatuses are preset for the following objects:
- Contacts
- Campaign
- Leads
- Account
- Case
- Contract
- Solution
- Product
The instructions below will guide you through the process of adding Document Status to the above-mentioned object record pages via a related list.
On your object record page click Edit Layout (alternatively, use Quick Find to select the object page and then click Edit).
Select Related Lists, find signNowStatuses, then drag and drop it in the object information area. Once finished, click Save.
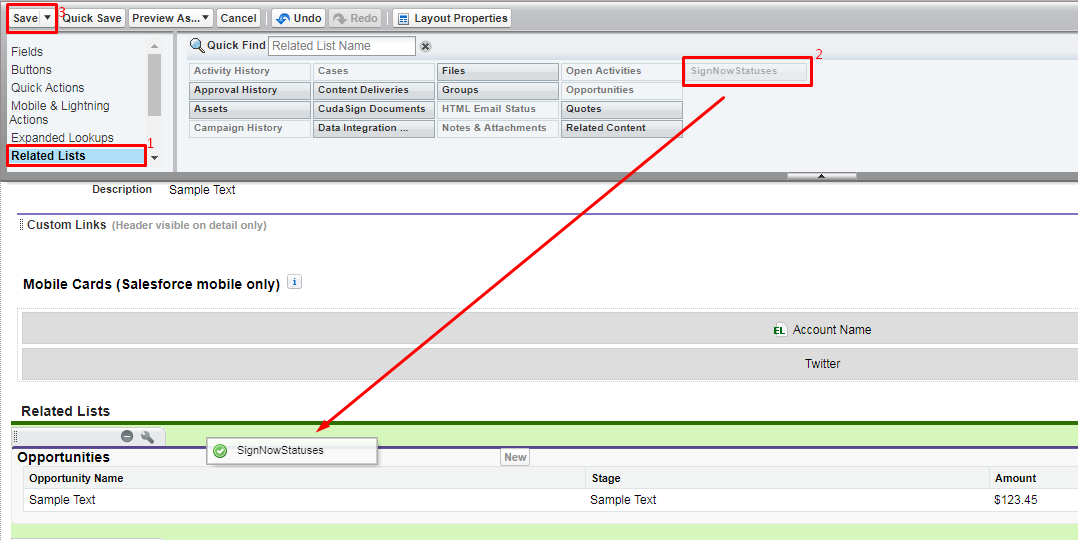
Click the wrench icon to set the properties for your Document Status.
You can select fields to display the related list as well as reorder them.
That’s it! signNowStatuses has now been added to your object record page. Once you have sent a document for e-signing, it will automatically appear in the signNowStatuses.
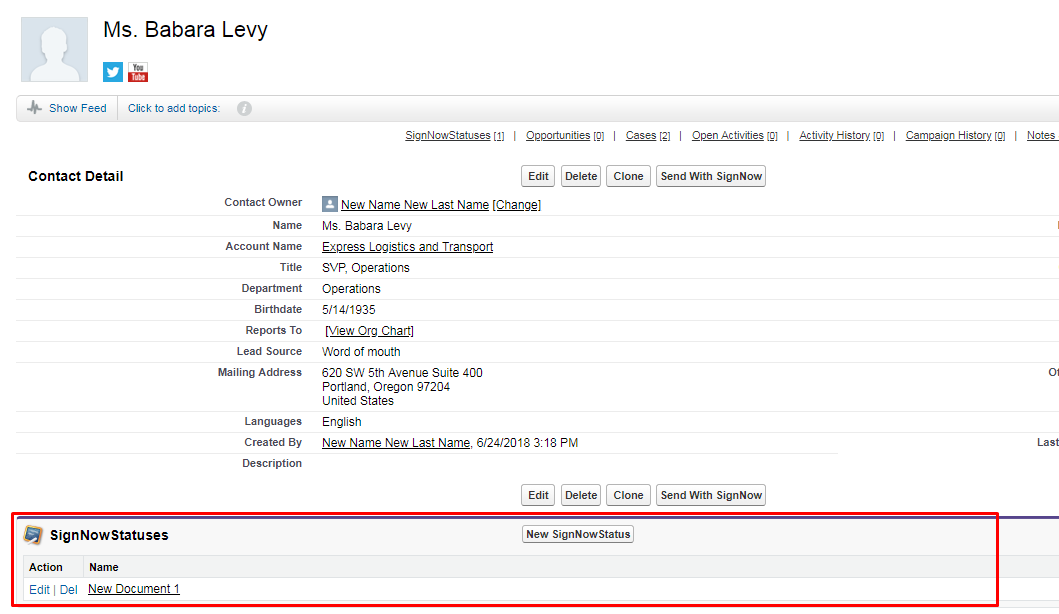
Click on a document to view its status and details.
If you want to add Document Status for objects that are not in the list mentioned above, follow the instructions below.
Switch to the signNow application and in the main menu choose the signNowStatuses section. Then, click the arrow icon on the right.
Note! If the signNowStatuses section doesn’t appear in the main menu, click the plus icon and find it in the All Tabs list.
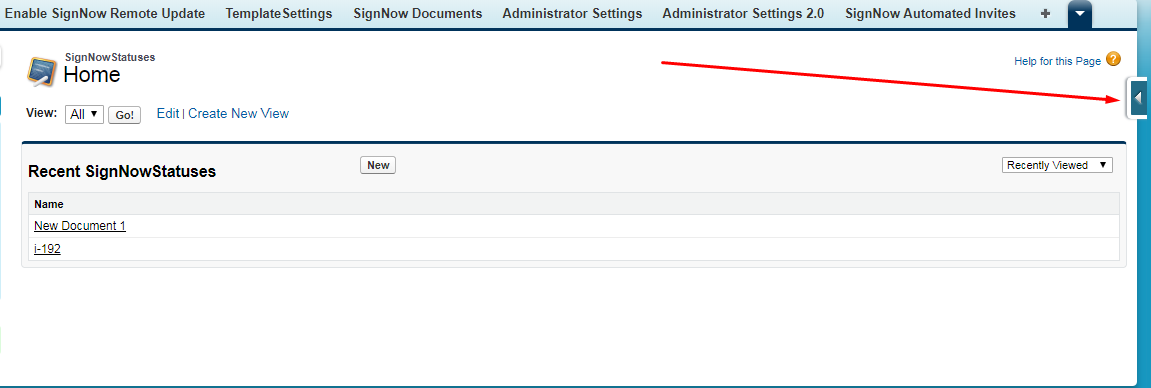
In the menu that will open next, click New, next to View Fields.
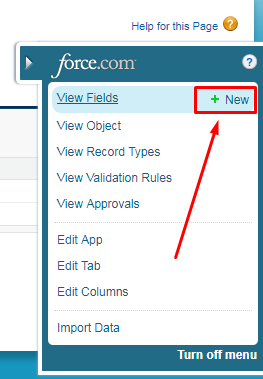
On the next page, choose the field type by selecting Lookup Relationship and set the object you want to add signNowStatuses for.
Once you have finished, the signNowStatuses will be automatically added to your object page.
Get instant information on the status of your invites. If your invite has been accepted, its status will be displayed as Fulfilled.
If your invite is awaiting acceptance, its status will be displayed as Pending.
If your invite has been declined, its status will still be displayed as Pending, but you will see Declined right next to the recipient’s email.
Updated almost 6 years ago
