signNow bulk invites
How to send signNow bulk Invites?
Send documents to be e-signed by multiple recipients. Once all copies have been signed, signNow collects and attaches them to the Salesforce record they were sent from and to each record they were sent to.
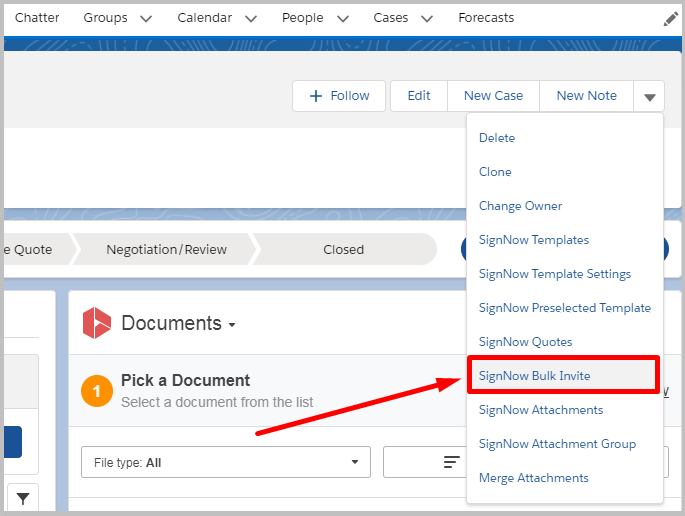
To send an invite, click Bulk Invite on your object page.
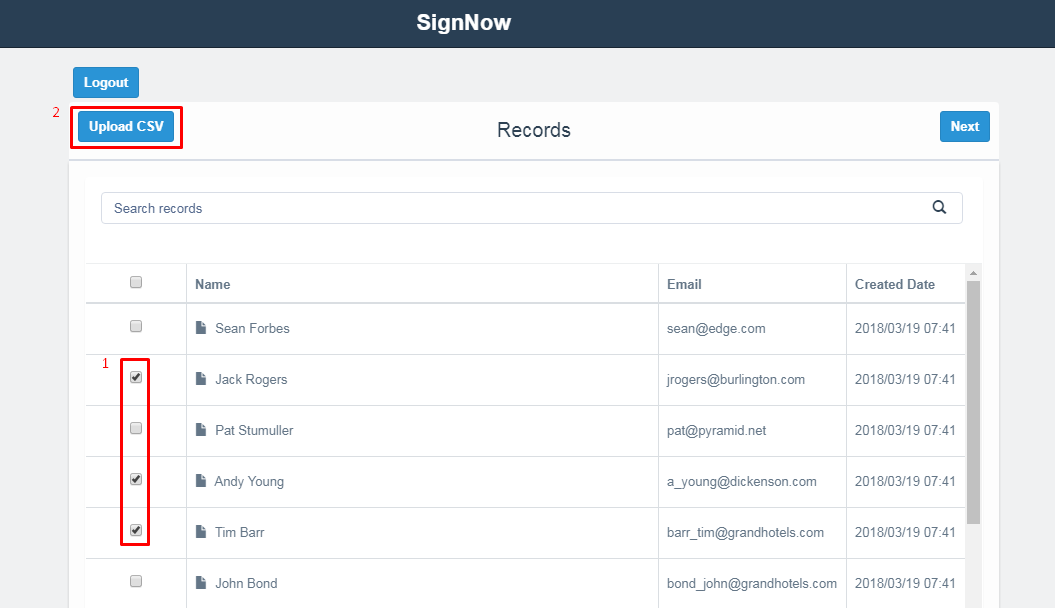
Select required contacts from the Records list by checking the boxes next to their names and clicking Next.
Alternatively, select Upload CSV to upload the list of your contacts in .csv format from your device.
Note: If you would like to send a Bulk Invite using a CSV file, make sure to prepare one using a comma-separated list for all required record IDs inside.
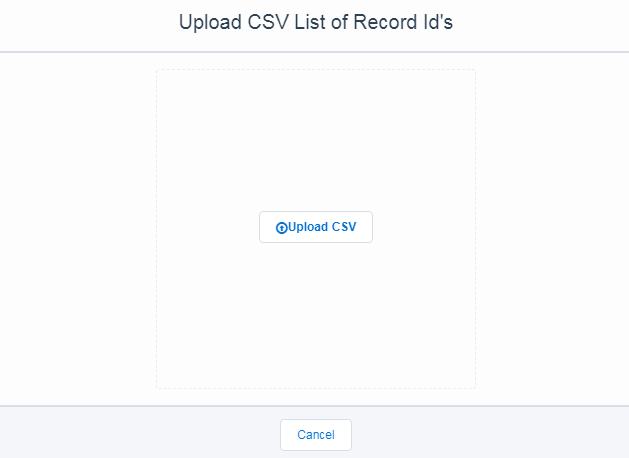
*Select Upload CSV in the Upload CSV List of record ID’s pop-up.
- When your file has been uploaded, click Next.

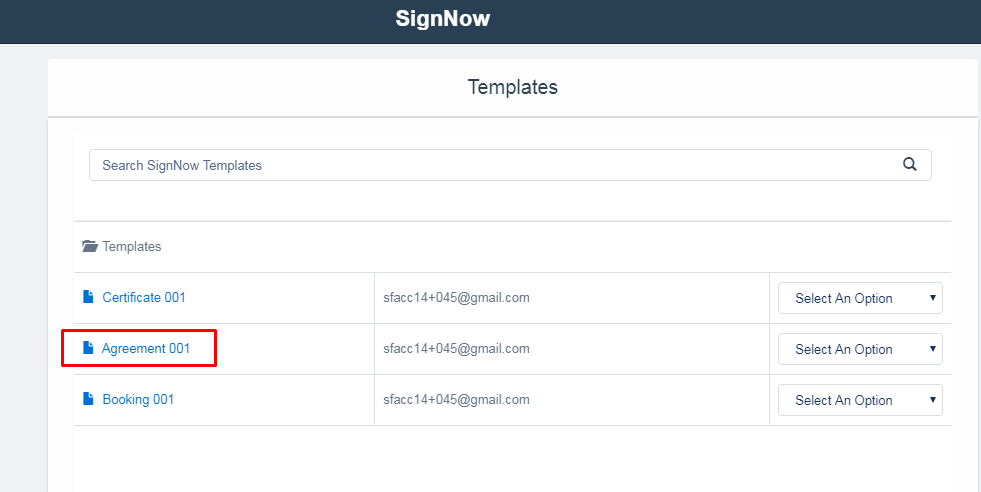
- Select a document from the list to be sent, click on it.
Specify a name for the new document and click Submit.

In the Signer field, enter {contact_bulk.Email} to send your Bulk Invite to the recipients selected on the previous step (by selecting the contacts or uploading the CSV file).
Alternatively, enter emails in the standard form ###@###. In this case, the Bulk Invite will only be sent to those emails that you’ve specified.
Enter emails for cc recipients in the standard form if needed.
Enter {contact_bulk.RECORD_FIELD_NAME} in the subject and the body of your Bulk Invite to automatically populate them with respective record fields data.
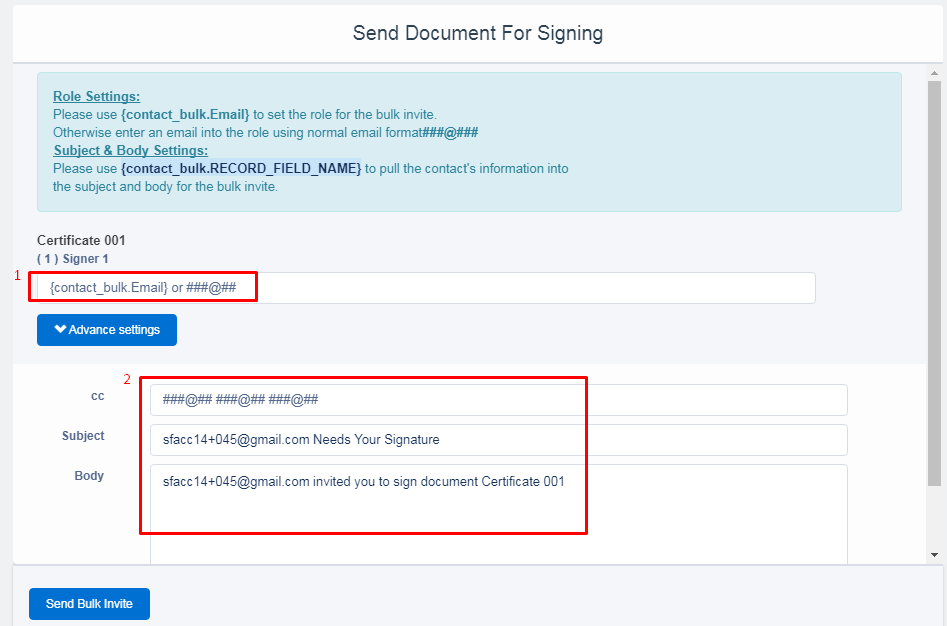
When finished, click Send Bulk Invite.
Data Binding for Bulk Invites
With the Data Binding option for Bulk Invites, you can send documents to be e-signed by multiple recipients while easily updating data in Salesforce records as well as prefilling your documents with the data from Salesforce invite records (other than the source records you’re sending your documents from). To do this, follow the step-by-step instructions below:
-
Go to the Salesforce object record and click the necessary button for Bulk Invites.
-
In the next window, select the recipients (records) you’d like to send a document to.
-
The Templates tab will open. Choose the document you want to send, then click the Options dropdown next to your selected document. Select the Salesforce Data Binding option from the dropdown menu.
-
The Data Binding window will open. For the Salesforce record type, select the record with _bulk. Alternatively, enter the name of your record and add _bulk. (contact_bulk in the example).
In the Salesforce record field section, choose the desired field.
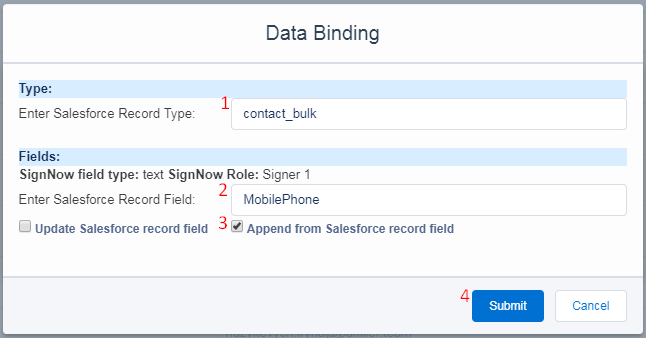
That’s it! Now the Data Binding will be used for records you will send your documents to.
Bulk invite logs
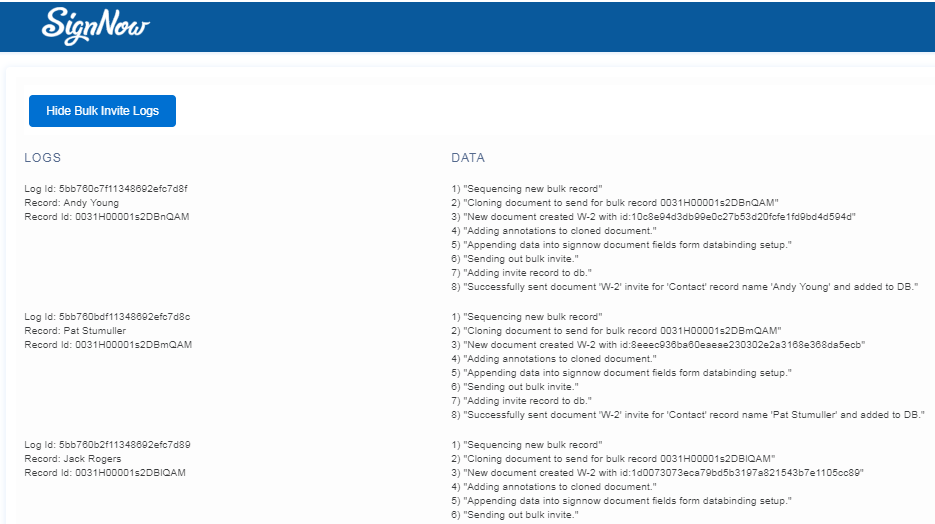
With the Bulk Invite Logs option, you can check whether your Bulk Invites have been created correctly and sent successfully.
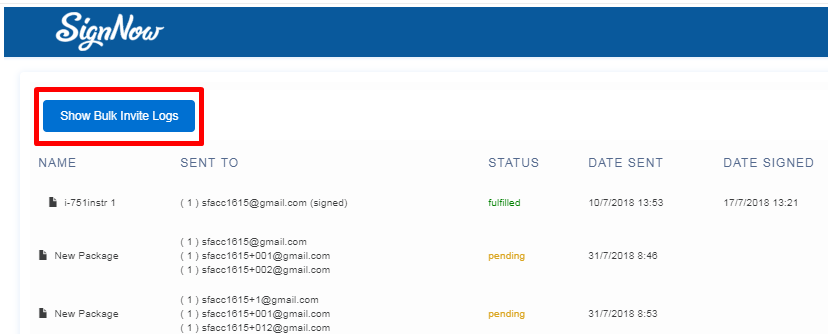
To retrieve information on the Bulk Invites you’ve sent, proceed to the signNow status canvas. Then select Show Bulk Invite Logs in the upper left corner.
In the next window, you will see the Logs details such as Log ID, record name and record ID as well as other Bulk Invites related data.
Updated almost 6 years ago
