Salesforce annotations
Easily add Salesforce Annotation Fields to your signNow templates and connect them to the Salesforce object record fields with Salesforce Annotations. Once your customers have received your template, such fields will be automatically filled with data from the particular Salesforce object record fields you have previously specified.
This section will guide you through the process of adding Salesforce annotations to your signNow templates.
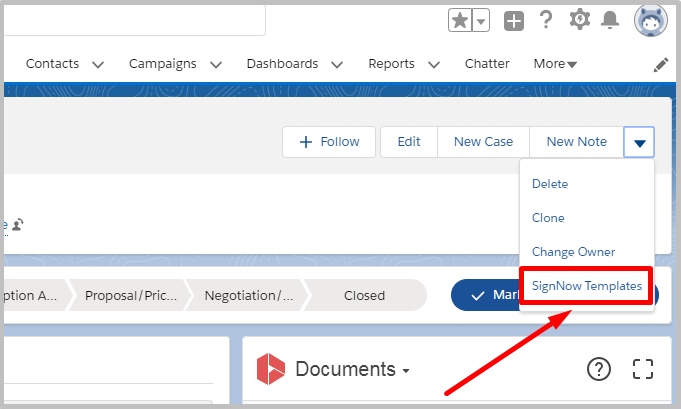
- In your object, click the signNow Templates button.
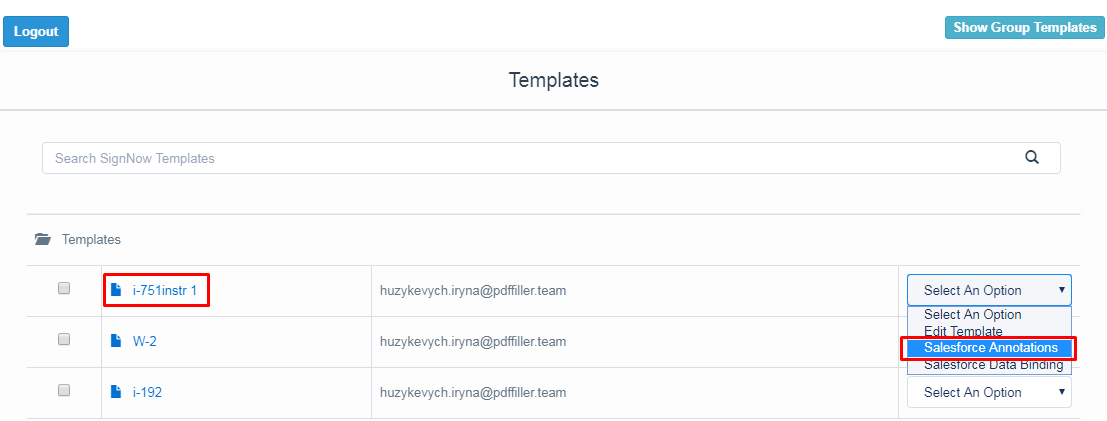
- The Template tab will open. In the Select Option dropdown menu, select your desired template, select Salesforce Annotations to add Salesforce annotation fields to your document in signNow.
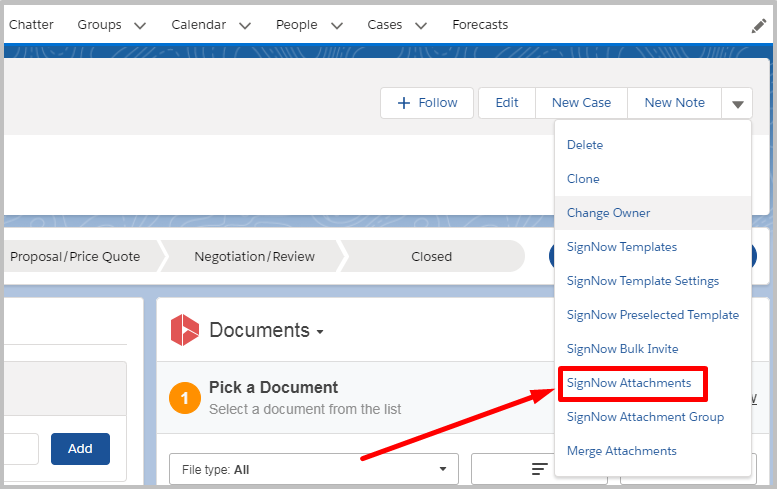
Alternatively, on your Salesforce object record page, click the signNow Attachments button.
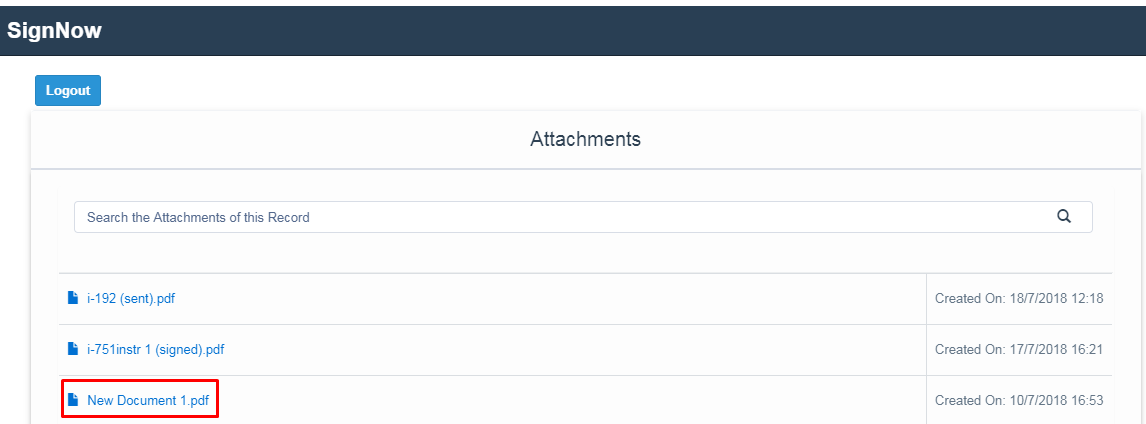
In the Attachments tab, click on the template you want to add Salesforce annotations to.
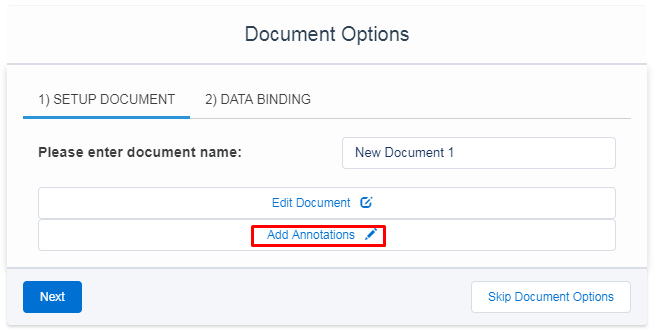
In the Document Options section, select Add Annotations at the bottom.
- Once the template has been opened, click Salesforce Field in the upper left corner. Then, drag and drop the field wherever you need in the document.

- In the field you’ve added, specify the Salesforce object and the Salesforce object record field which the Salesforce annotation field will be populated with. It is required to enter the object’s name first, then type the field’s name you want to get data from, separating them with a full stop.
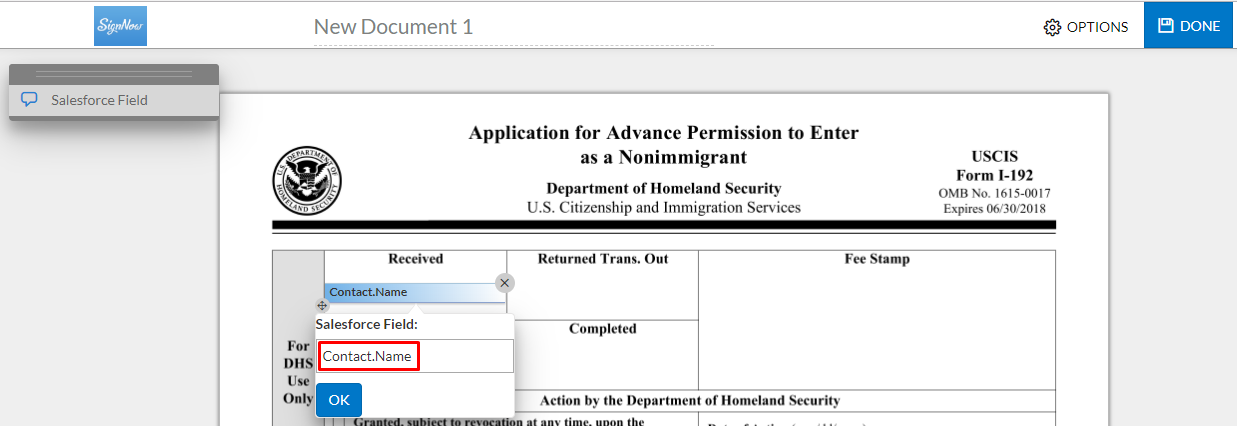
When the Salesforce object and field names have been specified, click OK.
Note! You can connect information from the current object as well as from its parent objects to the Salesforce annotations. In this case, you have to enter the current object’s name, its parent object’s name and then specify the needed Salesforce field’s name.
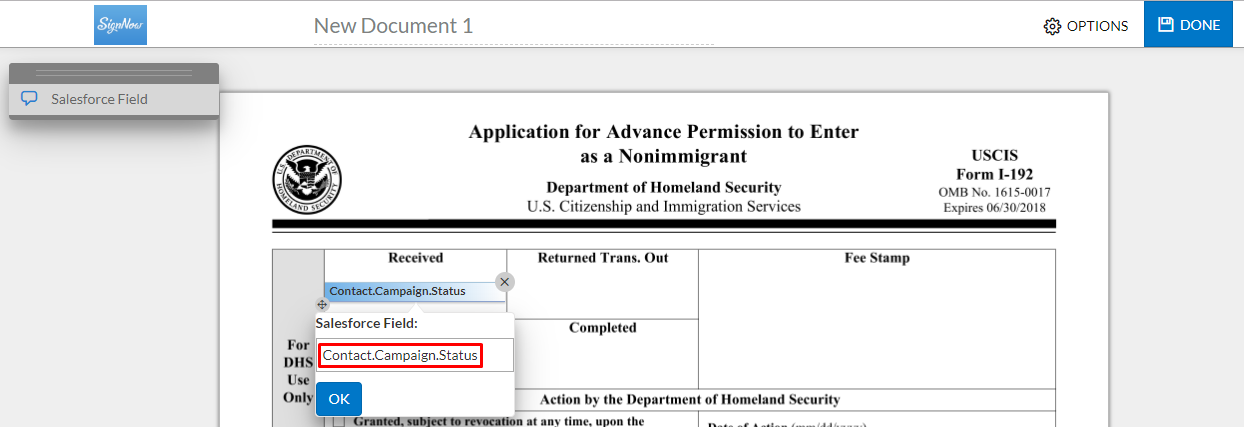
Once the Salesforce Annotations fields have been added, click Done in the upper right corner to save your settings.
That’s it! Now you can send your template out for signing to recipients. When they open your document, it will have its Salesforce Annotations fields populated with data from the specified Salesforce object.
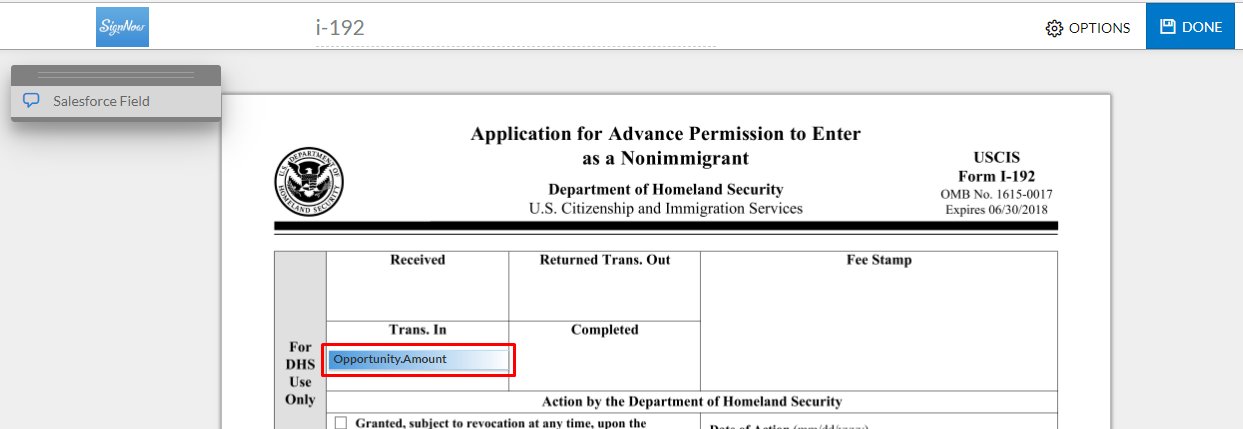
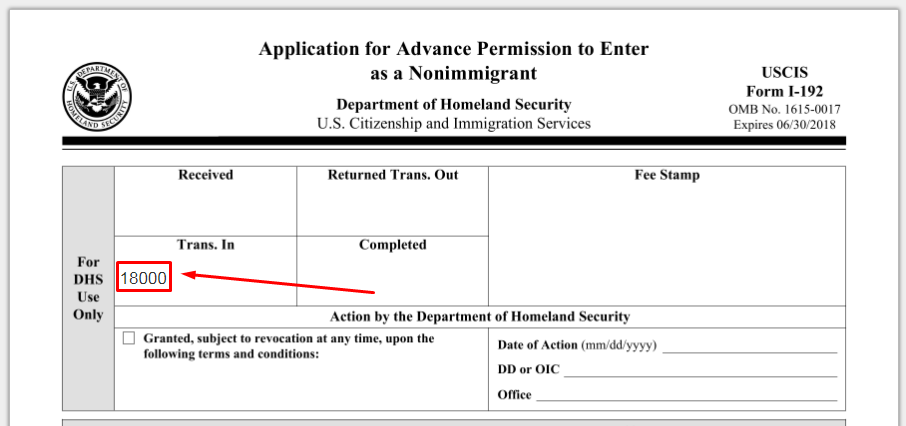
If you want to customize the line height or font size of the text to be added, go to the TemplateSettings section in the main menu. Then choose New to create a new TemplateSetting.
In the window that will open next enter the TemplateSetting name, then skip to the Annotation Config section and specify the desirable line height as well as font size for the text to be added using the following syntax:
"annotation_config":{
"line_height": 30,
"size": 25}
When finished, click Save.
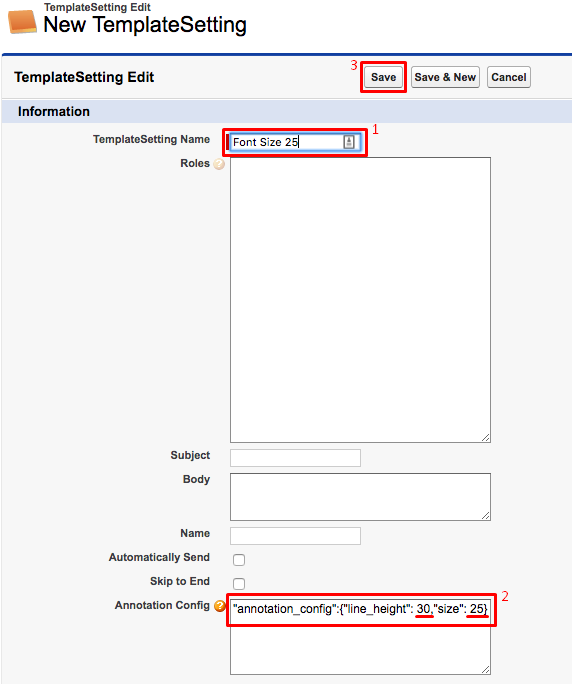
That’s it! Now the font size of text to be added to the Salesforce Annotations fields will be exactly you’ve specified in your TemplateSettings.
Updated almost 6 years ago
