signNow template settings
How to use template settings
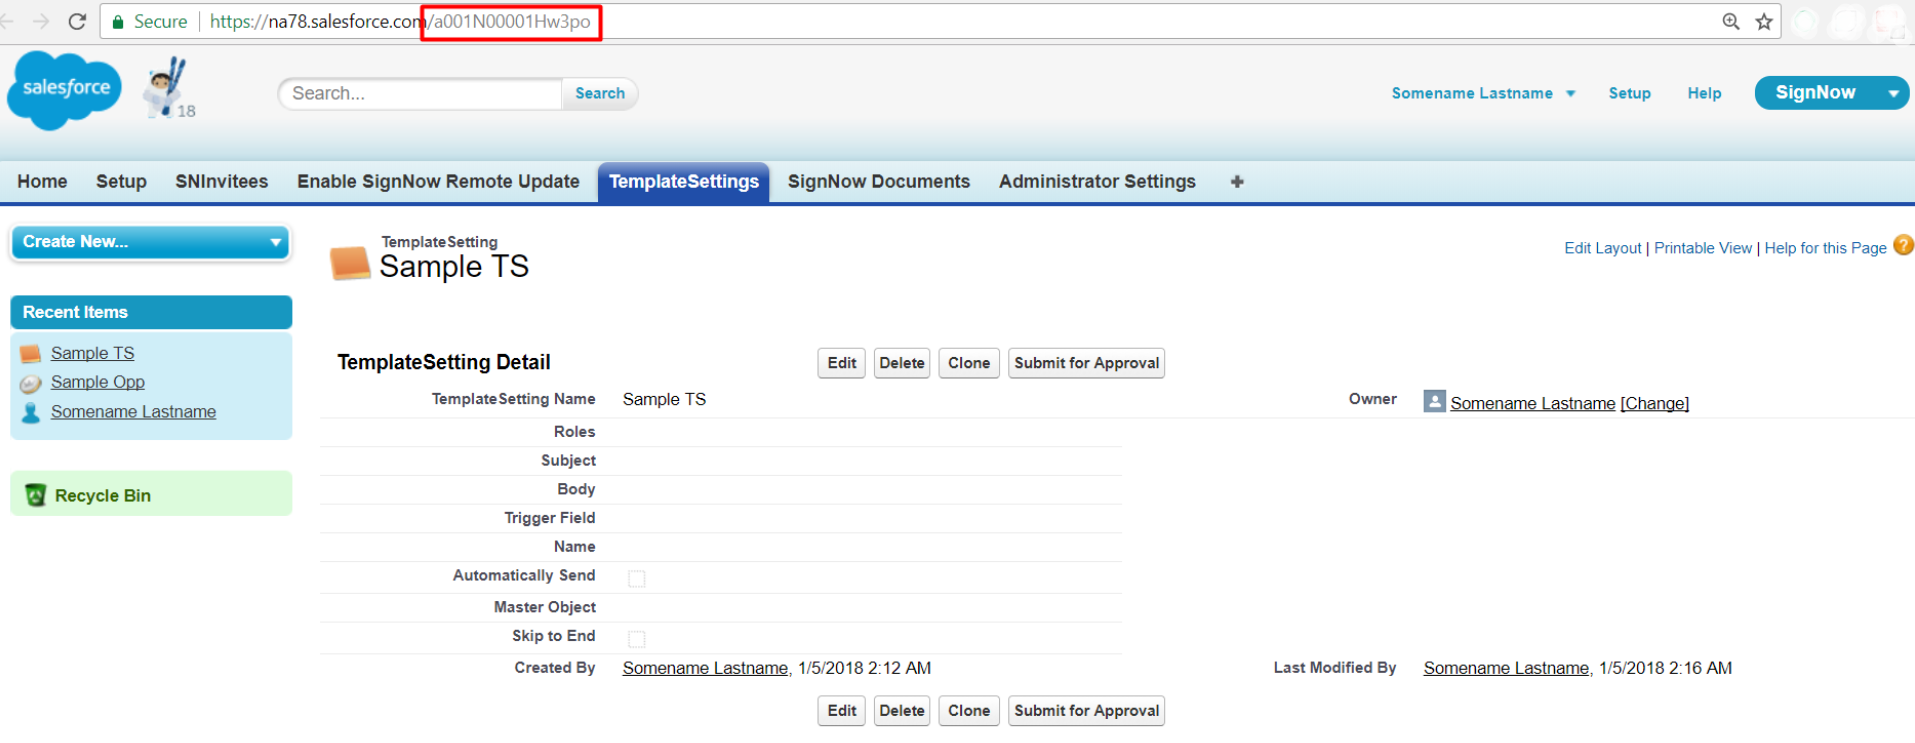
For the signNow Template Settings button to work correctly, you should replace sf template setting id in the button code (highlighted in yellow) with your Salesforce Template Setting ID.
To get the template setting ID, open or create a setting and copy the ID from the URL.
Send a document or a group of documents for signature with Preset Sending Settings using the signNow Template Settings Button.
- In your object, select the signNow Template Settings button.
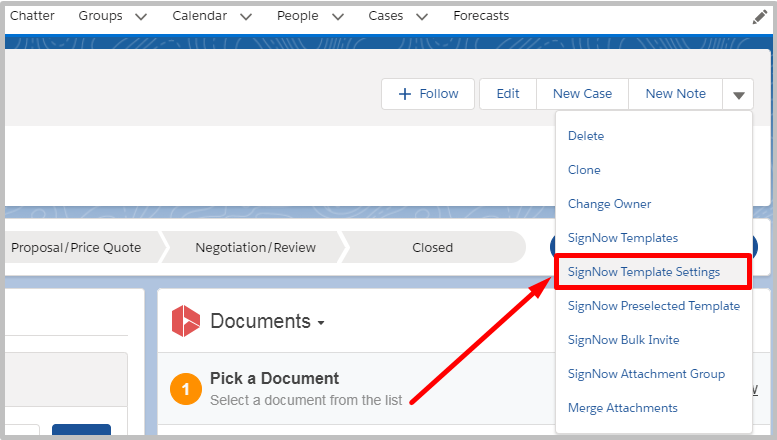
- In the signNow application, click on a template.
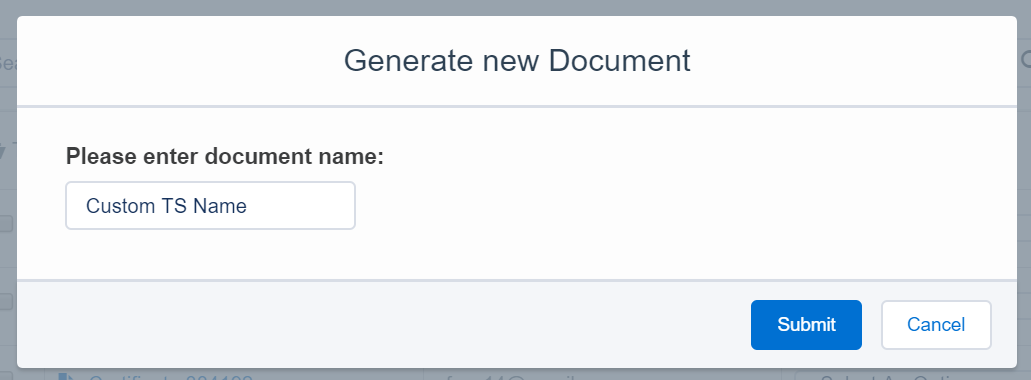
In the Generate New Document pop-up, a custom document name that was set in your TemplateSettings will appear. You can change it or leave it as is, then click Submit.
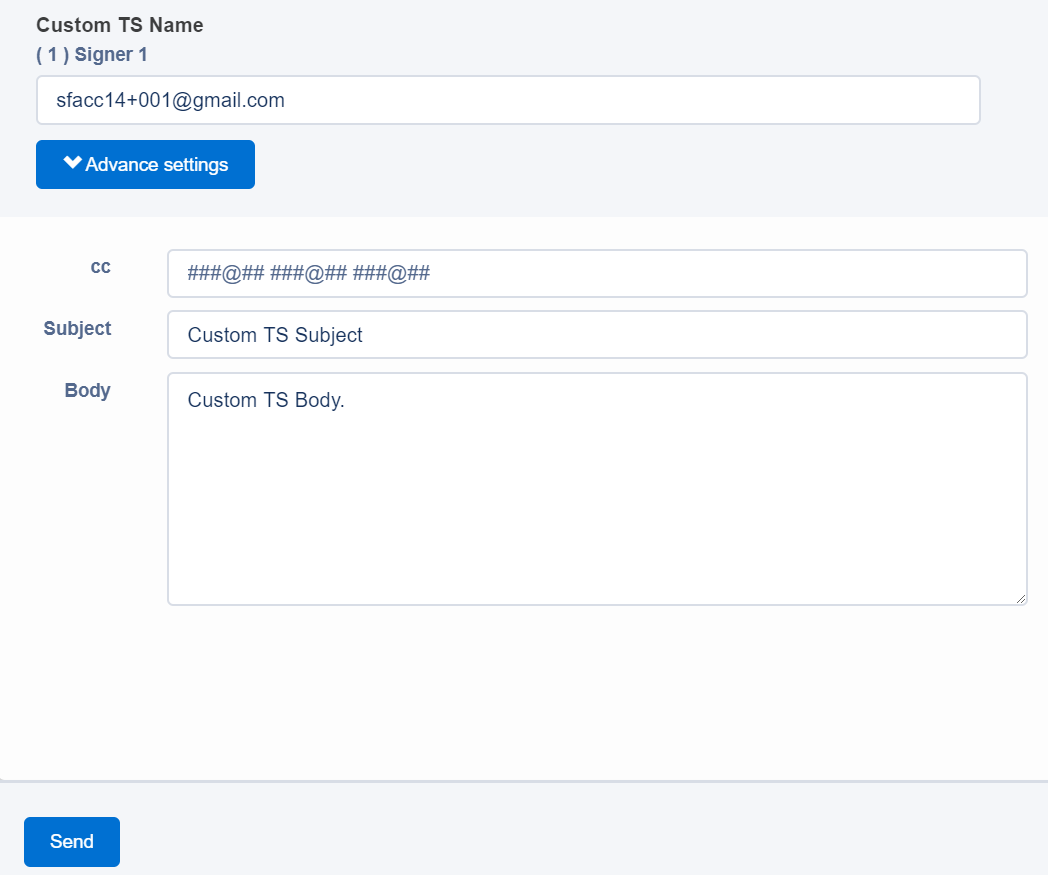
- The Send Document for Signing page with automatically preset TemplateSettings will open.
You can still change the settings or just click Send to send your document.
How to set template settings
Predefine recipients roles, add a custom subject and body to your emails, add recipients, set Skip to End and Automatic sending, etc., with signNow TemplateSettings.
- In your Salesforce org main menu to the upper right, select signNow.

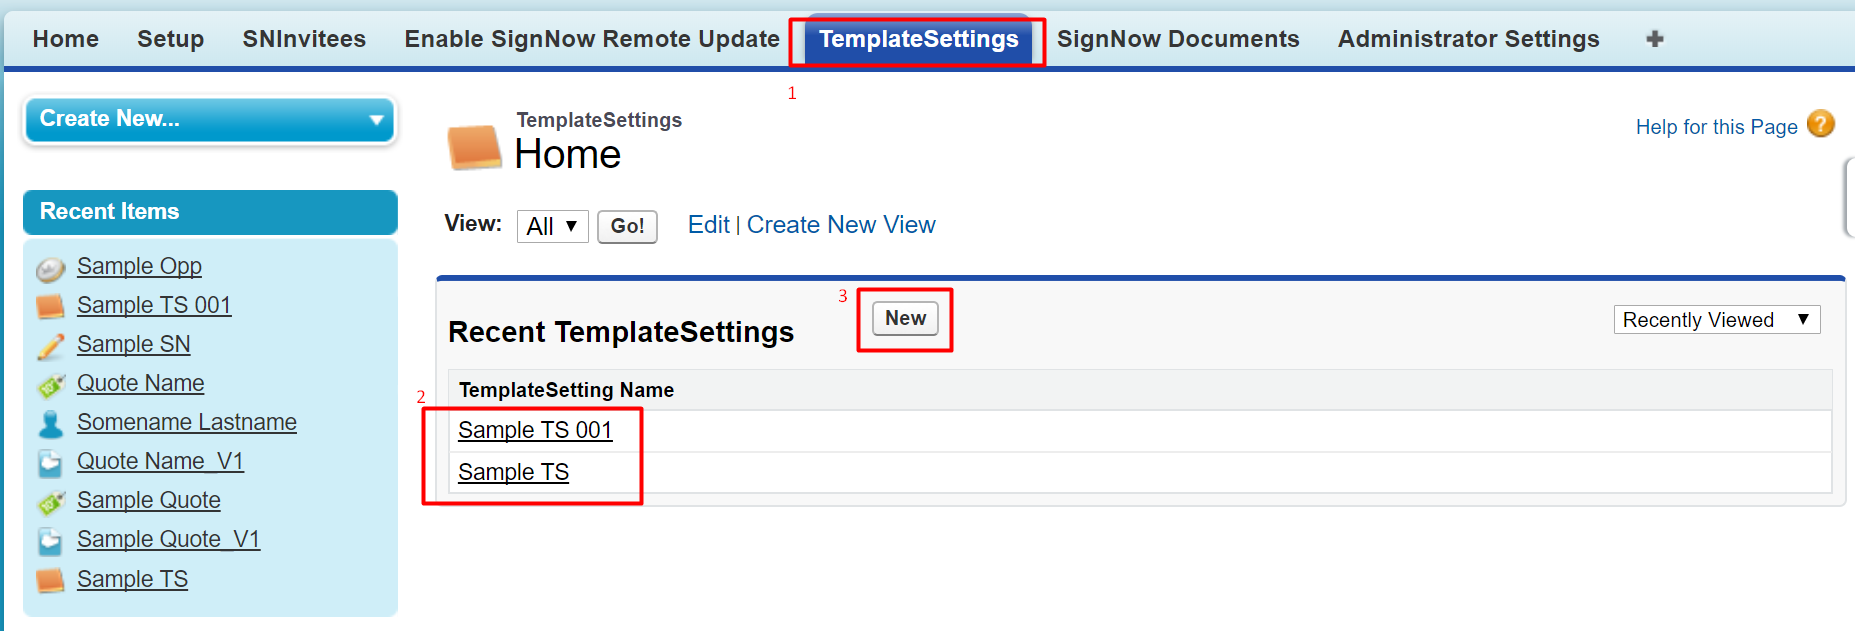
- Select the TemplateSettings tab. All your recent template settings are displayed in the list.
To create a new template setting click New.
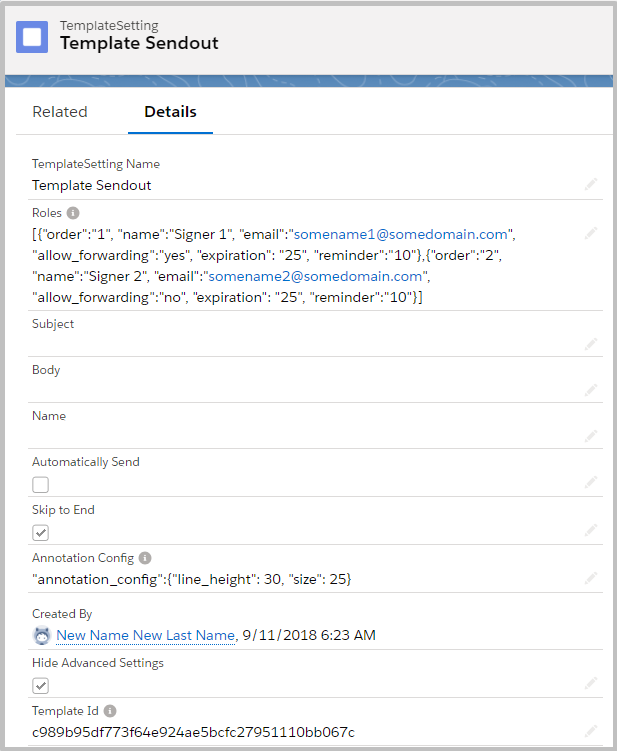
- Set all required TemplateSetting options:
-
Name the TemplateSetting.
-
Assign recipient roles. The roles must be entered in the following format:
[{"order":"1", "name":"Signer 1", "email":"[email protected]", "allow_forwarding":"yes"},{"order":"2", "name":"Signer 2", "email":"[email protected]", "allow_forwarding":"no"}]
Additional parameters for your TemplateSetting are available if needed:
- expiration date
- reminder
- password
The syntax will appear as follows:
[{"order":"1", "name":"Signer 1", "email":"[email protected]", "allow_forwarding":"yes", "expiration": "25", "reminder":"10", "password":"somepassword"},{"order":"2", "name":"Signer 2", "email":"[email protected]", "allow_forwarding":"no", "expiration": "25", "reminder":"10", "password":"somepassword"}]
Use the following syntax to load data from the current object directly to the TemplateSetting (the Contact object in the example):
{Contact.Name} recipient name loaded from the record field;
{Contact.Email} recipient email loaded from the record field;
{Contact.Date} date loaded from the record field, etc.
You can add as many fields as you need by separating them with periods.
-
Enter the subject for your TemplateSetting.
-
Provide a brief description that will be shown to recipients once they receive your signature request
-
Provide the name of your document you want to send out for e-signing.
-
Check the Automatically Send box to send your document automatically with the signNow TemplateSetting button.
-
Check the Skip to End box to make the document automatically open on the last step, skipping the document options settings.
-
In the Annotation Config section specify the desirable line height as well as font size for the text to be added to the Salesforce Annotations fields, using the following syntax:
"annotation_config":{
"line_height": 30,
"size": 25}
Note! If Annotations Config field doesn’t appear in the TemplateSettings after the signNow version has been updated, click Edit Layout on your Salesforce object record page, then drag and drop it from the Fields section.
Checking Hide Advanced Settings, the advanced settings section won’t be shown in the window for creating your sending.
Click Save to apply your settings and create a new TemplateSetting.
Updated almost 6 years ago
